Adding a checkbox in Google Sheets on an iPad is straightforward. You need to open the sheet, select the cells where you want checkboxes, and then insert them using the menu options. In a few taps, you can turn any cell into a clickable checkbox, making it easy to track tasks, mark items, or manage lists.
Adding a Checkbox in Google Sheets on iPad
Here’s a simple guide to help you add checkboxes to your Google Sheets using an iPad. Follow these steps to make your task lists more organized and interactive.
Step 1: Open Google Sheets App
First, launch the Google Sheets app on your iPad.
Make sure you are signed in with the Google account that has access to the sheet you want to edit.
Step 2: Open Your Spreadsheet
Tap on the file you want to add checkboxes to.
If you haven’t created a spreadsheet yet, you can start a new one by tapping the plus (+) icon.
Step 3: Select the Cells
Tap and drag to highlight the cells where you want checkboxes.
You can select multiple cells at once or just a single cell, depending on your needs.
Step 4: Open the Menu
Tap the three vertical dots in the top-right corner of the screen to open the menu.
This menu contains various options for editing your spreadsheet, including inserting checkboxes.
Step 5: Insert Checkbox
Select ‘Data Validation’ from the menu options.
Tap on ‘Criteria’ and choose ‘Checkbox.’
Step 6: Confirm Your Choice
Tap ‘Save’ to apply the checkbox to your selected cells.
Your cells are now equipped with checkboxes that you can check or uncheck with a simple tap.
Once you’ve completed these steps, each selected cell will display a checkbox. Tap the checkbox to mark it, and tap again to unmark it. Perfect for to-do lists, attendance tracking, and more.
Tips for Adding a Checkbox in Google Sheets on iPad
- Multiple Cells : Select multiple cells to add checkboxes in bulk.
- Custom Values : Use ‘Data Validation’ to assign custom values to checked and unchecked states.
- Formatting : Change the background color of the cells with checkboxes for better visibility.
- Copy-Paste : You can copy cells with checkboxes and paste them into different parts of your sheet.
- Mobile View : Check how your checkboxes look in mobile view to ensure they are easy to use.
Can I add checkboxes to merged cells?
No, Google Sheets does not support adding checkboxes to merged cells. You’ll need to unmerge the cells first.
Can I change the checkbox color?
No, the checkbox itself cannot be colored, but you can change the background color of the cell.
Can I link checkboxes to other cells?
Yes, you can link checkboxes to other cells using formulas that depend on the checkbox’s status.
What if I can’t find ‘Data Validation’?
Make sure your Google Sheets app is updated. If the option is still missing, try reinstalling the app.
Can I add checkboxes to protected sheets?
You can add checkboxes only if you have editing permissions for the protected sheet.
Summary
- Open Google Sheets App
- Open Your Spreadsheet
- Select the Cells
- Open the Menu
- Insert Checkbox
- Confirm Your Choice
Conclusion
Adding a checkbox in Google Sheets on iPad is a handy feature that can help you stay organized and track tasks more efficiently. Whether you’re managing a project, keeping tabs on inventory, or simply creating a to-do list, checkboxes make your life easier. The steps are simple enough that anyone can do it, even if you’re not tech-savvy.
Now that you know how to add checkboxes, why not give it a try? Open up your Google Sheets on your iPad and start adding checkboxes to see how they can streamline your workflow. Happy checkboxing!

Matthew Burleigh has been writing tech tutorials since 2008. His writing has appeared on dozens of different websites and been read over 50 million times.
After receiving his Bachelor’s and Master’s degrees in Computer Science he spent several years working in IT management for small businesses. However, he now works full time writing content online and creating websites.
His main writing topics include iPhones, Microsoft Office, Google Apps, Android, and Photoshop, but he has also written about many other tech topics as well.
Read his full bio here.
Featured guides and deals
The term “title” when working with a spreadsheet can mean the name of your workbook or the worksheet tab, or it might even be referencing the top row, or title row, that identifies the type of information in your columns.
Regardless of your needs, it can be helpful to learn how to include a title in Google Sheets.
Spreadsheets can be difficult to tell from one another when they are printed out, especially if they contain similar information.
Without an identifying title, for example, if might be difficult to tell the difference between your monthly sales report for January and your monthly sales report for February.
This confusion can lead to mistakes, so it’s best to avoid that sort of problem whenever possible.
One way that you can do this with your printed Google spreadsheets is to include the document title at the top of the page.
This information will appear at the top of every page, and the printed version of the spreadsheet will have the same name as the digital version that is saved to Google Drive.
So continue below to see how you can include the document title when you print from Sheets.
How to Put a Title on Google Sheets
- Open the spreadsheet.
- Change the file name at the top of the window.
- Click File , then Print .
- Select Headers & footers .
- Select Workbook title or Sheet name .
- Click Next .
- Click Print .
Our article continues below with additional information on how to add a title in Google Sheets, including pictures of these steps.
Deal of the Day
No products found.
Your iPhone’s name is something that you can change. Our guide on how to change an iPhone Bluetooth name will show you how .
How to Print a Title on Each Page in Google Sheets (Guide with Pictures)
The steps in this article were performed in the desktop version of the Google Chrome Web browser, but will also work in other desktop browsers like Firefox, Edge, or Safari.
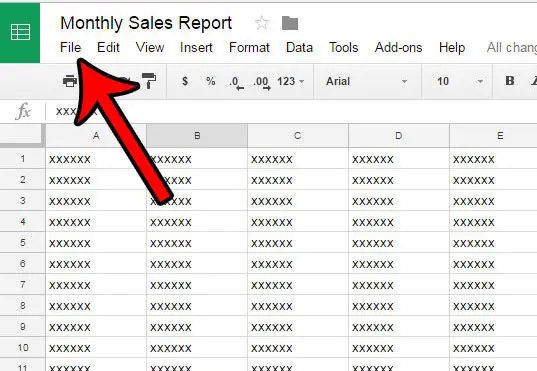
Step 1: Sign intoGoogle Sheetsand open the file you wish to edit.
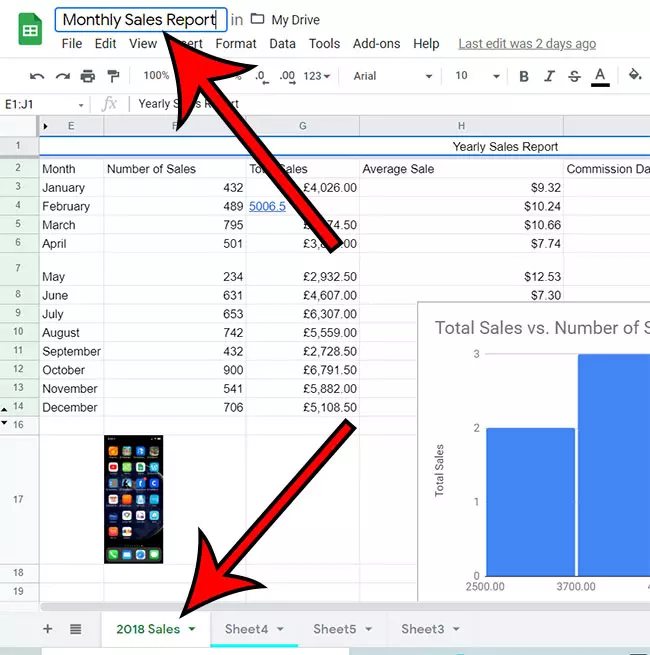
Step 2: Click on the workbook name at the top of the window and edit it as needed.
You will also have the option of printing the worksheet name if you would like. You can edit that by right-clicking the worksheet tab at the bottom of the window and choosing Rename .
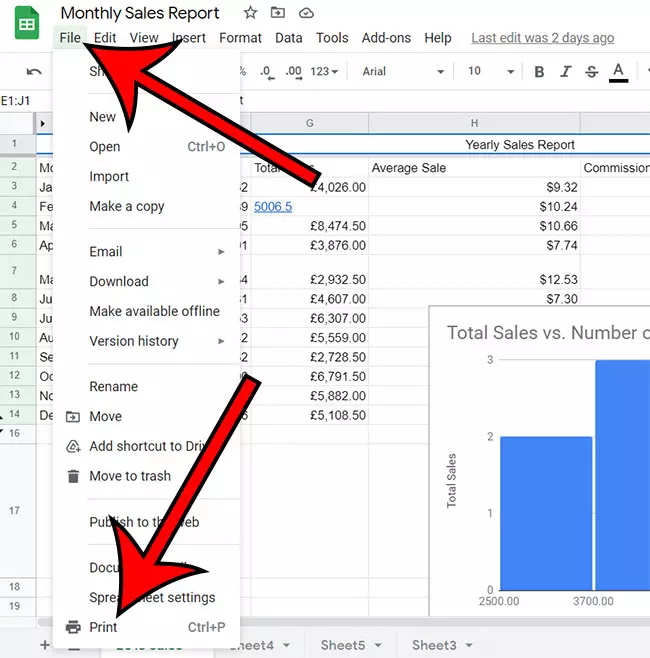
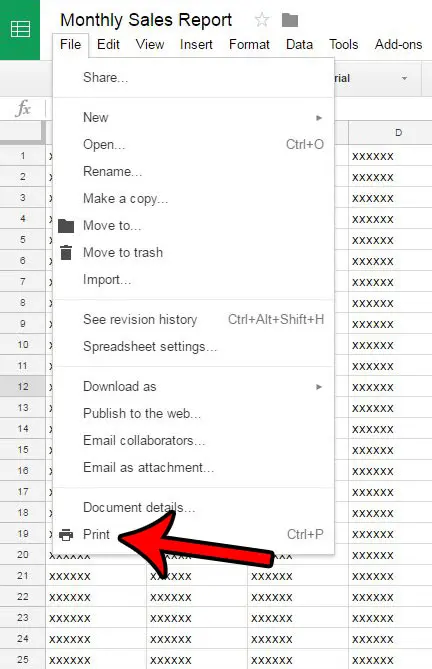
Step 3: Select theFiletab from the top left of the window, then clickPrintat the bottom of the drop down menu.
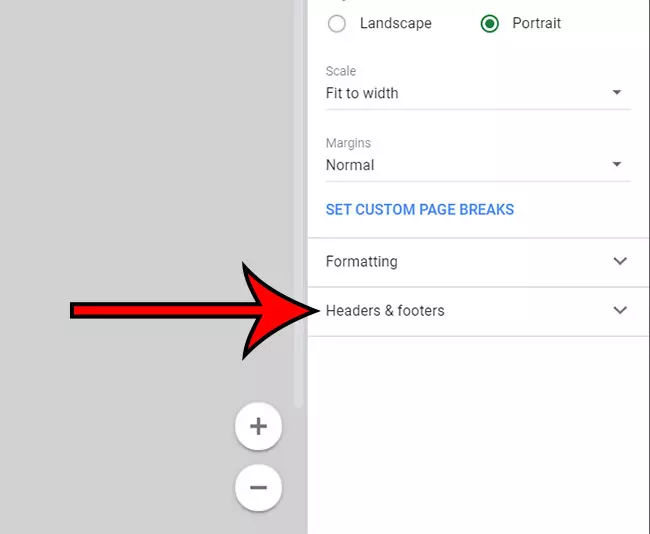
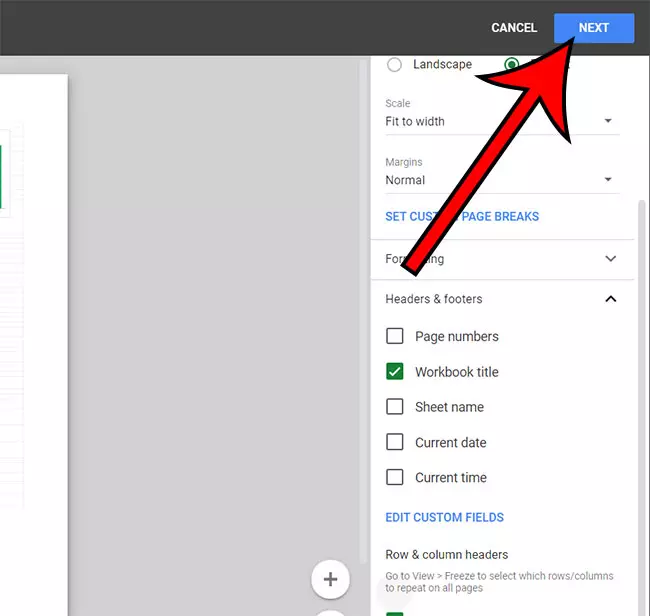
Step 4: Choose theHeaders & footerstab at the bottom right of the window.
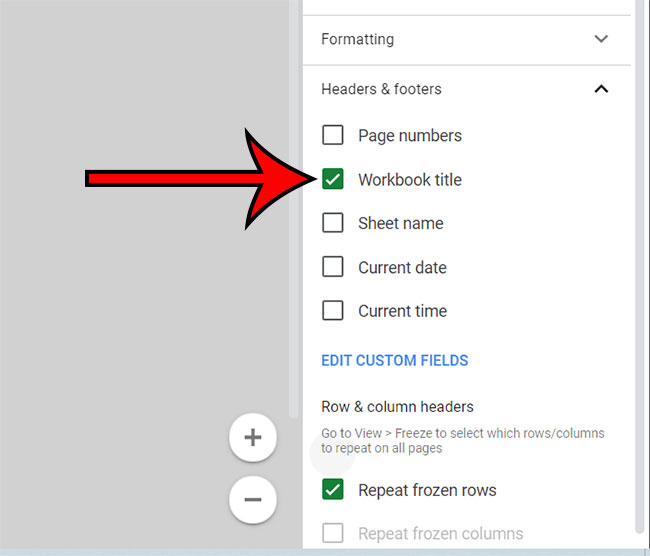
Step 5: Check the box to the left ofWorkbook title,Sheet name, or both.
If you select Workbook title, it will print at the top left of each page. If you select Sheet name, it will print at the top right of each page. These can be changed by choosing Custom Fields, however.
Step 6: SelectNextat the top right of the window.
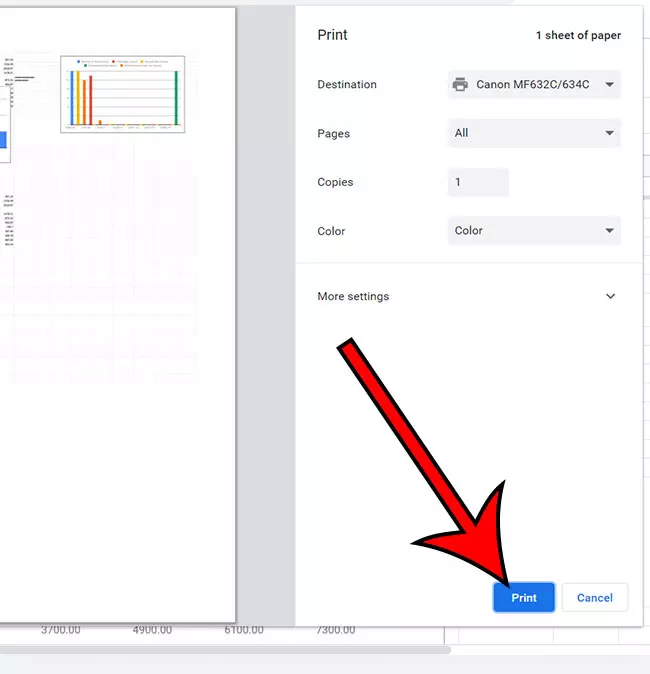
Step 7: Adjust any print settings as needed, then click thePrintbutton.
Now that you know how to add a title in Google Sheets, you can make sure that this information is included on your spreadsheets to help minimize future confusion.
The next section of this guide describes how to perform this action in older versions of Google Sheets. We also discuss additional information about printing Google Sheets titles.
If you’ve ever needed your spreadsheet in a different format, then our how to download Google Sheets guide can show you how to do it.
Old Method – How to Add a Title in Google Sheets
The steps in this section were for an older version of Google Sheets.
Step 1: Open your Sheets file in Google Drive. You can access Google Drive by going tohttps://drive.google.com.
Step 2: Click theFiletab at the top of the window.
Step 3: Click thePrintoption at the bottom of the menu.
You can also open the Print menu directly by pressing Ctrl + P on your keyboard.
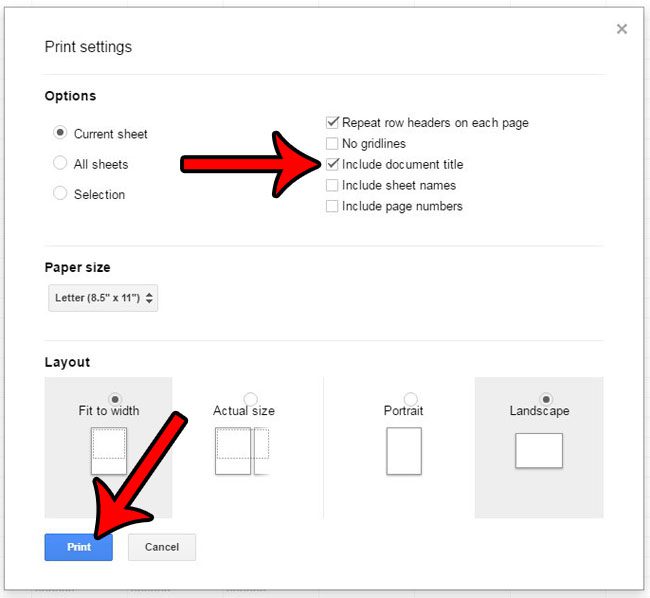
Step 4: Check the circle to the left ofInclude document title, then click thePrintbutton.
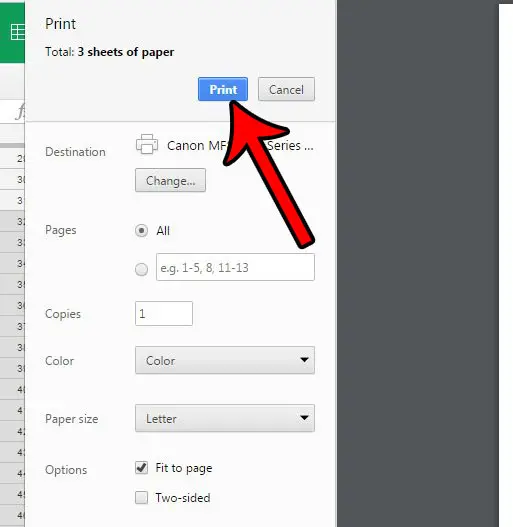
Step 5: Click thePrintbutton to print your document.
Note that, depending on your browser, you may see a preview of the printed document. Now is a good time to look it over to confirm that it will be printed with the desired formatting. If something looks wrong, you can click the Cancel button to go back and edit additional settings.
Many of the print settings that are available for Google Sheets are also available in Excel. You can read our Excel printing guide if you are more comfortable in that program and would prefer to edit the Print settings for your Excel files.
How to Add a Header Row in a Google Spreadsheet
If you aren’t trying to print your workbook title or worksheet name on your spreadsheet, then it’s possible that you are trying to create a title row, or header row using Google Sheets instead.
Typically a header row in a spreadsheet is the top row. Each of the columns in that row will have data that identifies the type of data that will appear in each of the cells in that column.
You can create a title row in a Google Spreadsheet by simply typing an identifier at the top of each column. For example, you might put something like “First Name” or “Last Name” if you are putting information about individuals into the sheet.
If there is already information in the first row, then you can right-click on the row 1 heading and choose Insert 1 above to add a blank row to the top of the spreadsheet.
Once you have created your header row in the top row, you can use the following steps to include that title row at the top of each printed page.
- Click View .
- Select Freeze , then 1 row .
- Click File , then Print .
- Select Headers & footers .
- Scroll down and select Repeat frozen rows .
Now, when you print your spreadsheet, that top title row should appear as the first row on each page. Additionally, it will stay visible even as you scroll down on the screen when editing your Google spreadsheet in your Web browser.
More Information on How to Include the Document Title at the Top of the Page When Printing from Google Sheets
The steps in this guide showed you how to change the print settings for your spreadsheet so that the document title prints at the top of each page. This will not affect any of your other spreadsheets in Google Drive. If you would like to change the title that prints at the top of the page, you can do so by clicking the title at the top of the Sheets tab and editing it.

As mentioned earlier, the keyboard shortcut to open the Print menu in Google Sheets is Ctrl + P. This same shortcut is used in a lot of other spreadsheet and document editing applications like Microsoft Excel, Microsoft Word, and Google Docs.
You can change where the workbook title or sheet tab prints by choosing the Custom Fields option under Headers & footers. There, you will be able to click in a header or footer quadrant and select the information that you would like to print in that location.
Some of the other information that you can include when you are customizing the headers and footers of your Google spreadsheets are page numbers, the current date, and the current time.
- How to merge cells in Google Sheets
- How to wrap text in Google Sheets
- How to alphabetize in Google Sheets
- How to subtract in Google Sheets
- How to change row height in Google Sheets
- How to Add a Row to a Table in Google Docs
Matthew Burleigh has been writing tech tutorials since 2008. His writing has appeared on dozens of different websites and been read over 50 million times.
After receiving his Bachelor’s and Master’s degrees in Computer Science he spent several years working in IT management for small businesses. However, he now works full time writing content online and creating websites.
His main writing topics include iPhones, Microsoft Office, Google Apps, Android, and Photoshop, but he has also written about many other tech topics as well.
Read his full bio here.
Featured guides and deals
