Animating on an iPad can be a super fun and creative way to bring your ideas to life. With a few simple steps, you can learn how to create amazing animations right at your fingertips. All you need is an iPad, an animation app, and a bit of imagination. Let’s dive in!
How to Animate on iPad
In this tutorial, you’ll learn how to use your iPad to create animations from scratch. We’ll break it down into easy steps so you can follow along and start animating in no time. By the end, you’ll have a basic animation that you can share with friends and family.
Step 1: Choose an Animation App
Pick an animation app like Procreate, FlipaClip, or Animation Desk.
You need a good app to get started. Procreate is great for drawing and has animation tools too. FlipaClip is specifically made for animation and is easy to use. Animation Desk is another solid choice with various features.
Step 2: Create a New Project
Open the app and start a new project.
Once you’ve chosen your app, open it and create a new project. This usually involves selecting a canvas size and frame rate. The frame rate determines how smooth your animation will be.
Step 3: Draw Your First Frame
Use the drawing tools to sketch your first frame.
This is where you get to be creative! Draw your first frame using the drawing tools in your app. It’s like making a flipbook, so think of this as the starting picture.
Step 4: Add More Frames
Create additional frames to continue your animation.
Now, you’ll add more frames to your project. Each frame should have slight changes from the previous one. This gives the illusion of movement when played back.
Step 5: Play and Edit Your Animation
Preview your animation and make any necessary edits.
Most apps have a play button to preview your work. Check your animation and make any edits if something doesn’t look right. You can always go back and adjust your frames.
Step 6: Export Your Animation
Save your animation and export it as a video file.
Once you complete these steps, you’ll have your very own animation to show off! You can keep it simple or add more details to make it extra special.
Tips for Animating on iPad
- Start Simple: Begin with short, simple animations to get the hang of it.
- Use Layers: Most apps have layers, which can help you manage different parts of your animation.
- Refer to Tutorials: Look up tutorials specific to your chosen app for more detailed guidance.
- Save Frequently: Always save your work regularly to avoid losing progress.
- Experiment: Don’t be afraid to try new things and experiment with different techniques.
What is the best animation app for iPad?
There are several great options like Procreate, FlipaClip, and Animation Desk. The best one depends on your specific needs and skill level.
Do I need an Apple Pencil to animate on an iPad?
While an Apple Pencil can improve precision, it’s not necessary. You can still create animations using your fingers or a basic stylus.
How much storage do I need for animation apps?
Animation apps can be storage-heavy, especially if you’re working on large projects. Aim for at least 64GB of storage on your iPad.
Can I use a free app for animating?
Yes, there are free apps like FlipaClip that offer basic animation tools. However, paid apps often provide more advanced features.
How do I share my animations?
Most animation apps allow you to export your work as a video file. You can then share it via social media, email, or any other platform.
Summary
- Choose an animation app.
- Create a new project.
- Draw your first frame.
- Add more frames.
- Play and edit your animation.
- Export your animation.
Conclusion
Animating on an iPad is a fantastic way to explore your creativity and produce impressive visuals. Whether you’re a beginner or experienced artist, this guide offers a straightforward path to start animating on your iPad. With just a few steps, you can bring your drawings to life and share your creations with the world.
Remember, practice makes perfect. Don’t get discouraged if your first few animations don’t turn out exactly as you envisioned. Keep experimenting and trying new techniques. The more you animate, the better you’ll get at it.
For further reading, consider exploring advanced tutorials or taking online courses to hone your skills. And if you haven’t already, it might be worth investing in an Apple Pencil for more precise control.
Now that you know how to animate on an iPad, it’s time to get started. Grab your iPad, open your chosen app, and let your imagination run wild!

Matthew Burleigh has been writing tech tutorials since 2008. His writing has appeared on dozens of different websites and been read over 50 million times.
After receiving his Bachelor’s and Master’s degrees in Computer Science he spent several years working in IT management for small businesses. However, he now works full time writing content online and creating websites.
His main writing topics include iPhones, Microsoft Office, Google Apps, Android, and Photoshop, but he has also written about many other tech topics as well.
Read his full bio here.
Featured guides and deals
When you are printing your slides in Powerpoint 2010, either for your own records or as handouts for your audience, it can be difficult to tell where one slide ends and another begins, particularly when you are printing a large number of slides on one page.
This problem is multiplied even more if your slides are very full and contain a lot of information along the edges.
This can generate printed slide pages that look jumbled and might accidentally confuse your audience.
One way to alleviate this problem is by learning how to print a frame around your slides in Powerpoint 2010 , which offers a visual boundary that identifies the information that should be contained to each slide.
Printing Slides with Frames in Powerpoint 2010
Although it may seem that way because of how you design and edit your slides, Powerpoint slides do not technically have borders or frames.
The default setting when printing multiple slides per page will include a frame around each slide, but if you have inadvertently changed this setting at some point, or if you are trying to put a frame around pages with only one slide, then that is an option you can configure yourself.
Step 1: Open the slideshow in Powerpoint 2010 to which you want to add frames when printing.
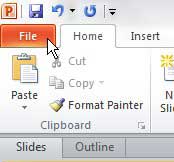
Step 2: Click the File tab at the top-left corner of the window.
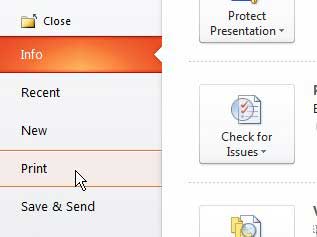
Step 3: Click Print at the left side of the window.
Step 4: Click the Full-page Slides drop-down menu at the center of the window, then click the Frame Slides option.
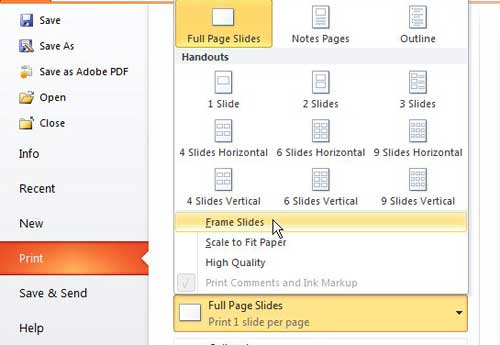
Note that this is the menu that you will use to configure the number of slides that are printed on each page in Powerpoint.
Step 5: Once you have configured all of the settings that you need for your printed Powerpoint presentation, click the Print button at the top of the window.
Now that you know how to print a frame around slides in Powerpoint 2010, you can quickly and easily apply that effect to all of the slides in your presentation.
Matthew Burleigh has been writing tech tutorials since 2008. His writing has appeared on dozens of different websites and been read over 50 million times.
After receiving his Bachelor’s and Master’s degrees in Computer Science he spent several years working in IT management for small businesses. However, he now works full time writing content online and creating websites.
His main writing topics include iPhones, Microsoft Office, Google Apps, Android, and Photoshop, but he has also written about many other tech topics as well.
Read his full bio here.
Featured guides and deals
