Changing the iTunes backup location on Windows 11 can be a handy trick to free up space on your primary drive or to better organize your files. While iTunes itself doesn’t offer a direct option to change the backup location, you can achieve this by creating a symbolic link that redirects the backup to your desired folder. Don’t worry, it’s simpler than it sounds! In a few straightforward steps, you can manage this tweak and regain control over your storage situation.
Changing iTunes Backup Location on Windows 11
By following these instructions, you’ll be able to redirect your iTunes backups to a different folder, freeing up space on your main drive and keeping your data organized.
Step 1: Locate the Current Backup Folder
First, you need to find where iTunes currently stores its backups on your computer.
The default location for iTunes backups is usually within a hidden folder in your user directory. It’s called “Backup” and can be found under C:/Users/[YourUsername]/Apple/MobileSync/Backup . You can navigate there by entering the path in the File Explorer or by using the Run dialog.
Step 2: Create a New Backup Folder
Create a new folder in your preferred location where you want the iTunes backups to be stored.
You can put this folder anywhere, like on an external drive or another partition. Just make sure it’s somewhere with enough space to hold all your backups. Name it something you’ll easily recognize, like “iTunesBackup_New.”
Step 3: Copy Existing Backups
Move any existing backups from the old folder to the new one.
Before moving on, it’s a good idea to transfer any files from the old backup folder to the new location. This ensures you have all your old backups available in case you need them later.
Step 4: Create a Symbolic Link
Use Command Prompt to create a symbolic link from the original backup folder to the new location.
Open Command Prompt as an administrator and type the following command: mklink /J “C:Users[YourUsername]AppleMobileSyncBackup” “D:[PathToNewBackupFolder]” . Replace [YourUsername] and [PathToNewBackupFolder] with your actual username and the path to your new backup folder.
Step 5: Verify the Change
Check that the symbolic link was created successfully and iTunes is using the new location.
To confirm, go back to the original backup folder’s location. It should now appear as a shortcut that points to your new folder. Open iTunes and perform a backup to ensure it’s storing data in the right place.
Once you complete these steps, iTunes will start saving backups to your new designated folder. This change won’t affect your ability to restore from backups, which will now be housed in the new location. It’s a seamless transition that gives you the flexibility to manage your storage better.
Tips for Changing iTunes Backup Location on Windows 11
- Ensure the new backup location has ample storage space to prevent failed backups.
- Double-check the command syntax to avoid errors when creating the symbolic link.
- Consider using an external drive or network location for backups if space is a concern.
- Regularly check your new backup folder to make sure backups are updating correctly.
- Understand that relocating backups may affect how quickly iTunes performs backups and restores.
Can I change the iTunes backup location to a cloud storage folder?
Yes, as long as the cloud folder is synced locally on your computer, you can redirect iTunes backups there.
What happens if I delete the symbolic link by mistake?
Deleting the symbolic link will break the connection between iTunes and your new folder. Recreate it using the same steps to restore functionality.
Is it safe to move iTunes backups to an external drive?
Yes, but ensure the drive is always connected when you need to perform backups or restores.
Will changing the backup location affect my iOS devices?
No, this change won’t affect how iOS devices communicate with iTunes. They’ll continue to work as usual.
Can I revert the backup location to its original setting?
Yes, simply remove the symbolic link and restore the original backup folder in its previous location.
Summary of Steps
- Locate the current backup folder.
- Create a new backup folder.
- Copy existing backups.
- Create a symbolic link using Command Prompt.
- Verify the change.
Conclusion
Changing the iTunes backup location on Windows 11 is a simple yet effective way to manage your computer’s storage. By relocating backups to a more convenient or spacious location, you free up space on your main drive, which can significantly improve your system’s performance. Once you’ve set up the symbolic link, all your future backups will be automatically directed to the new folder, making it a one-time task with lasting benefits.
Understanding how to control where your data is stored is like having the keys to your digital kingdom. It not only offers flexibility but also peace of mind knowing your backups are safely stored and easily accessible. As our digital lives grow, managing storage efficiently becomes crucial, and this small tweak goes a long way in aiding that effort.
Consider this process a stepping stone to mastering other tech-savvy tweaks. If you’ve found this guide helpful, take the time to explore more ways to optimize your digital space. Whether it’s organizing files or learning new shortcuts, every bit of knowledge adds up to a smoother, more tailored user experience. Keep experimenting and finding solutions that suit your personal setup!

Matthew Burleigh has been writing tech tutorials since 2008. His writing has appeared on dozens of different websites and been read over 50 million times.
After receiving his Bachelor’s and Master’s degrees in Computer Science he spent several years working in IT management for small businesses. However, he now works full time writing content online and creating websites.
His main writing topics include iPhones, Microsoft Office, Google Apps, Android, and Photoshop, but he has also written about many other tech topics as well.
Read his full bio here.
Featured guides and deals
Do you have a long list of songs in your iTunes library, and want to view them when you are not near your computer? This can be helpful if you want to create a playlist while you are traveling, or if you want to see if there are songs that you do not own and want to purchase. One simple way to do this is to print out a list of all of the songs that you have in iTunes.
You might have previously done this in an earlier version of iTunes, but are having trouble doing so in iTunes 11. Fortunately it is still possible, and you can follow the few short steps in our tutorial below and print a document with a list of songs.
How to Print a List of Your iTunes Library in iTunes 11 in Windows
- Open iTunes .
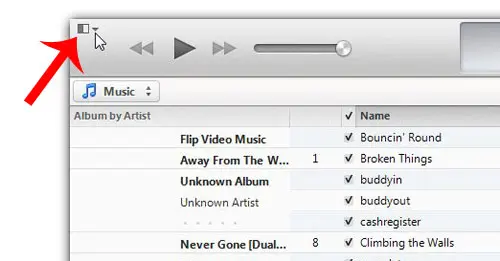
- Click the menu icon.
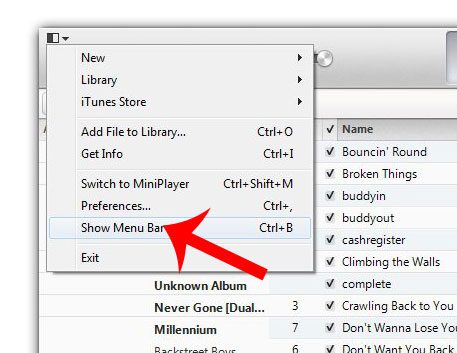
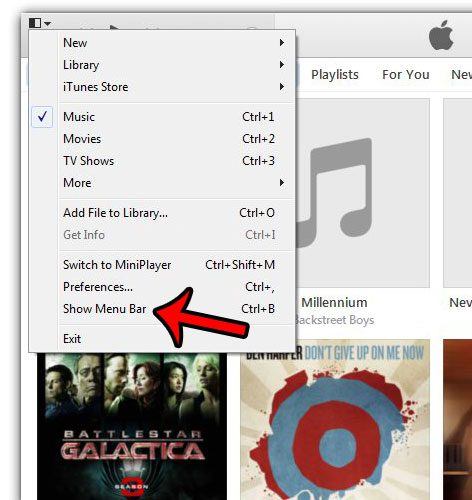
- Choose Show Menu Bar .
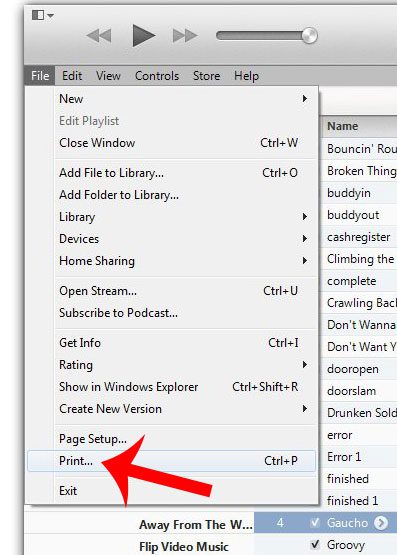
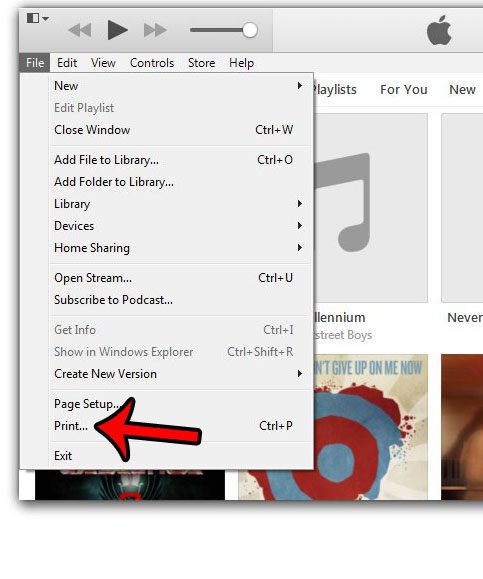
- Select File , then Print .
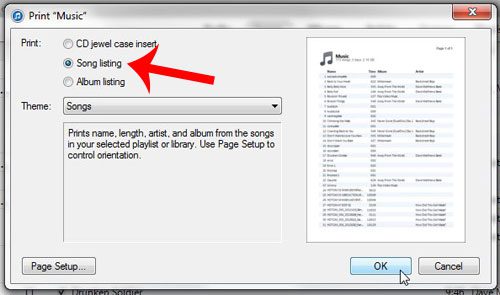
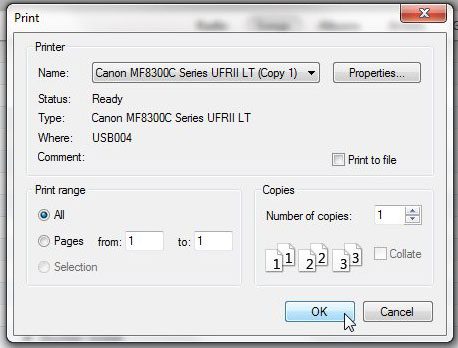
- Choose Song Listing , then OK .
- Click Print .
Our guide continues below with additional information on working with song and file lists in iTunes, including pictures of these steps.
Printing Your iTunes Library in Windows
The steps in this tutorial were written using iTunes 11 on a Windows computer . We will be printing a list of the songs in your library in the steps below. The steps may be slightly different if you are using a different version of iTunes, or if you are on a Mac.
Step 1: Launch iTunes, then navigate to the library or playlist that you want to print.
Step 2: Click the iTunes menu icon at the top-left corner of the window.
Step 3: Click the Show Menu Bar option.
Step 4: Click the File tab at the top of the window, then click the Print option.
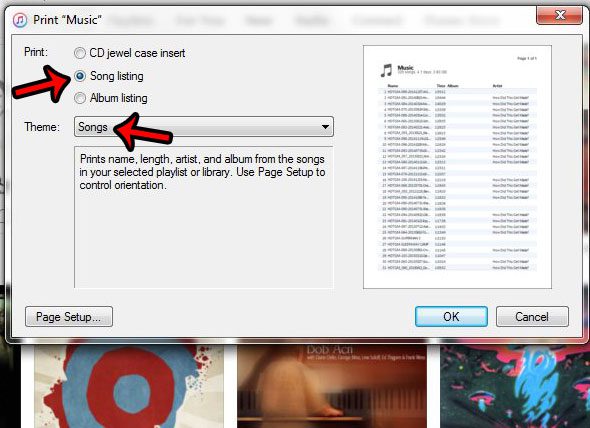
Step 5: Click the Song Listing option, then click the OK button.
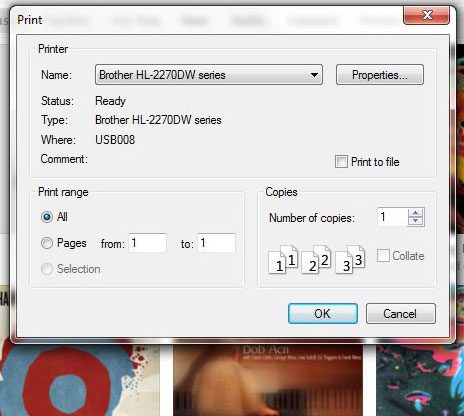
Step 6: Click the Print button to print the list.
Do you want to download purchased songs in iTunes, but you are not able to? You might need to authorize your computer with your Apple ID to enable the ability to download songs through the program.
How to Create a List of Your iTunes Music Library
If you have ever needed to share a list of the songs in your iTunes library, whether you were planning an event, or were making a playlist of CD for someone, then you may have been looking for a simple way to generate that list. You can accomplish this goal by printing your library as a document, which can save you the hassle of a series of screenshots, or manually writing or typing a list.
But the option for printing a list of your iTunes library is not immediately obvious, so you can follow our guide below to see how to use the built-in printing functionality of iTunes on your Windows computer.
Print Your iTunes Library as a List in Windows 7
The steps in this article were performed using iTunes version 12.3.1.23, on a computer running Windows 7. However, this process is similar for many other iTunes versions in Windows.
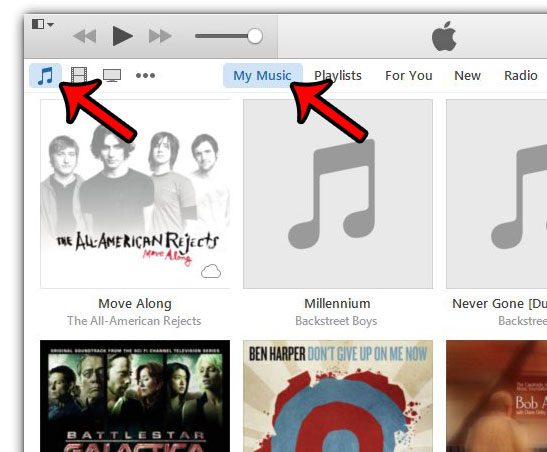
Step 1: Launch iTunes, then click the Music button, and select the My Music option to display your iTunes library. If you would prefer instead to create a list of movies or TV shows, then select that option instead.
Step 2: Click the iTunes Menu button at the top-left corner of the window, then click the Show Menu Bar option. You can also display the Menu Bar by pressing Ctrl + B on your keyboard.
Step 3: Click File , then click Print . Note that you can shortcut to the Print menu by pressing Ctrl + P on your keyboard instead.
Step 4: Select either the CD jewel case insert , Songs , or Albums option in the top-section, then click the Theme drop-down menu to specify how you want your selection to be listed. You can click the OK button at the bottom of the window when you have finished.
Step 5: Change any of the options that you wish to adjust on this window, then click the OK button to print the list of songs.
Did you add a gift card to your iTunes account, and you want to see how much is left on it? Learn how to check your Apple gift card balance from an iPhone.
Matthew Burleigh has been writing tech tutorials since 2008. His writing has appeared on dozens of different websites and been read over 50 million times.
After receiving his Bachelor’s and Master’s degrees in Computer Science he spent several years working in IT management for small businesses. However, he now works full time writing content online and creating websites.
His main writing topics include iPhones, Microsoft Office, Google Apps, Android, and Photoshop, but he has also written about many other tech topics as well.
Read his full bio here.
Featured guides and deals
