If you’re finding Copilot on Windows 11 more of a hindrance than a help, deleting it might be the best option. This guide will show you how to easily remove Copilot, giving you more control over your system. In just a few steps, you’ll be able to uninstall it without any hassle.
How to Delete Copilot Windows 11
Here’s a breakdown of the steps you’ll need to follow to delete Copilot from Windows 11. Follow these instructions carefully, and you’ll have it uninstalled in no time.
Step 1: Open Settings
The first thing you need to do is open the Settings app.
To do this, click on the Start menu and select the gear icon or simply press Win + I on your keyboard. The Settings app is the control center for all system configurations.
Step 2: Navigate to Apps
Next, you need to go to the Apps section.
In the Settings window, look for the “Apps” option in the left-hand menu and click on it. This section contains all the installed applications on your system.
Step 3: Find Copilot
Now, locate the Copilot application in the list of installed apps.
Scroll through the list or use the search bar to find “Copilot.” This step is crucial because you need to ensure you’re deleting the right application.
Step 4: Uninstall Copilot
Finally, click on the Copilot app and select the uninstall option.
A prompt will appear asking you to confirm the uninstallation. Click “Uninstall” again to remove Copilot from your system.
Step 5: Restart Your Computer
Restart your computer to complete the process.
Rebooting ensures that any remaining files or processes related to Copilot are completely removed from your system.
After completing these steps, Copilot will be completely uninstalled, freeing up system resources and potentially improving performance.
Tips for Deleting Copilot Windows 11
Here are some additional tips to keep in mind when deleting Copilot from Windows 11:
- Backup Important Files: Make sure to back up any important files before uninstalling any software.
- Check Dependencies: Verify if any other applications rely on Copilot to function properly.
- Use Safe Mode: If you encounter any issues, try uninstalling Copilot in Safe Mode.
- Update Windows: Ensure your Windows 11 is up to date to avoid any conflicts.
- Third-Party Tools: Consider using third-party uninstaller tools for a more thorough cleanup.
How do I know if Copilot is installed?
You can check if Copilot is installed by navigating to the Apps section in Settings and looking for it in the list of installed applications.
Will deleting Copilot affect my other apps?
Deleting Copilot should not affect other applications unless they specifically rely on it to function. Always check for dependencies.
Can I reinstall Copilot later?
Yes, you can reinstall Copilot from the Microsoft Store or the official website if you change your mind.
What should I do if the uninstall fails?
If the uninstall fails, try restarting your computer and attempting the process again. You can also try uninstalling in Safe Mode.
Is there an alternative to deleting Copilot?
Yes, you can disable Copilot instead of uninstalling it if you think you might need it later.
Summary
- Open Settings
- Navigate to Apps
- Find Copilot
- Uninstall Copilot
- Restart Your Computer
Conclusion
Deleting Copilot from Windows 11 is a straightforward process that can be accomplished in a few simple steps. By following the steps outlined in this guide, you can easily remove Copilot from your system, freeing up resources and potentially improving your computer’s performance.
Remember, if at any point you decide you want Copilot back, you can always reinstall it. Additionally, make sure to follow the tips provided to ensure a smooth uninstallation process and avoid any potential issues.
For further reading, consider checking out guides on how to optimize your Windows 11 system or how to manage installed applications effectively. Taking control of your system is empowering, and knowing how to delete unnecessary apps like Copilot is a valuable skill. Happy computing!

Matthew Burleigh has been writing tech tutorials since 2008. His writing has appeared on dozens of different websites and been read over 50 million times.
After receiving his Bachelor’s and Master’s degrees in Computer Science he spent several years working in IT management for small businesses. However, he now works full time writing content online and creating websites.
His main writing topics include iPhones, Microsoft Office, Google Apps, Android, and Photoshop, but he has also written about many other tech topics as well.
Read his full bio here.
Printers can be a source of problems for many computer users. They have a lot of moving parts that need to be replaced, and they require constant replenishment of very expensive ink and toner.
A printer that was previously working perfectly may even start saying that it’s offline, such as described in this article .
Occasionally a printer will break, stop working, or get replaced, so you need to uninstall it from your computer.
Often this can be as simple as removing the device from Windows 7. But it can also be a little more complicated than that, especially if the problem that you were having was related to a bad driver installation or a hidden file stuck in your print queue.
Fortunately, our guide below can provide some solutions to the problems that you are having as you try to completely remove a printer from your Windows 7 computer.
Removing a Printer and Printer Driver in Windows 7
The guide below is going to show how to first remove a printer in Windows 7, then how to remove a print driver in Windows 7, then a couple of troubleshooting steps if a print driver will not uninstall.
You are going to be performing some actions that require you to have administrator access to Windows 7, so make sure that you are either signed into an Administrator account, or that you have the administrator credentials for your computer.
Before you get started, check that your printer doesn’t have a specific program installed with it. In some cases uninstalling the program for the printer can take care of the entire uninstall process for you. Simply disconnect the printer cable from the computer first, then uninstall the printer program like any other program in Windows 7 by following the steps in this article .
If this is not an option for you, however, follow the steps below.
Step 1: Disconnect the printer cable from the computer, if it is a USB connection.
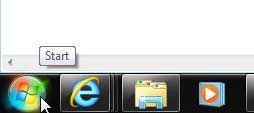
Step 2: Click the Start button at the bottom-left corner of the screen.
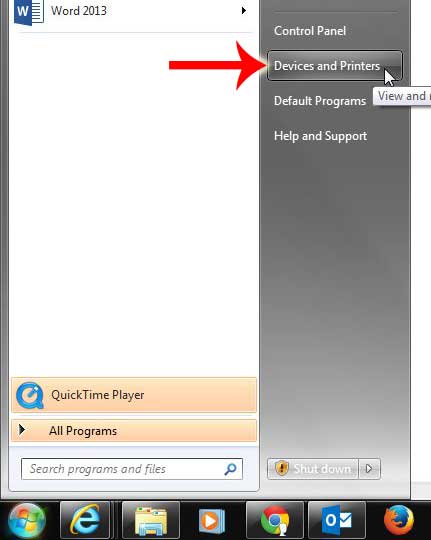
Step 2: Click Devices and Printers in the column at the right side of the menu.
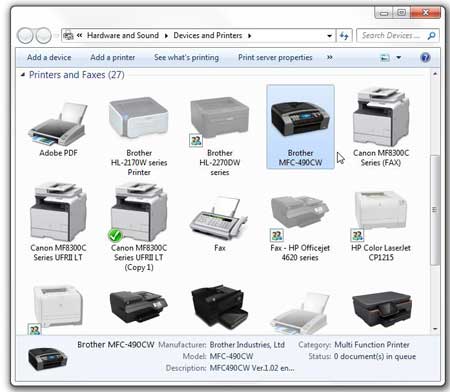
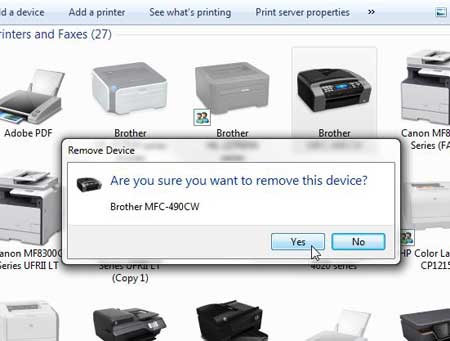
Step 3: Locate the printer that you want to remove. In this case we are removing the Brother MFC 490CW.
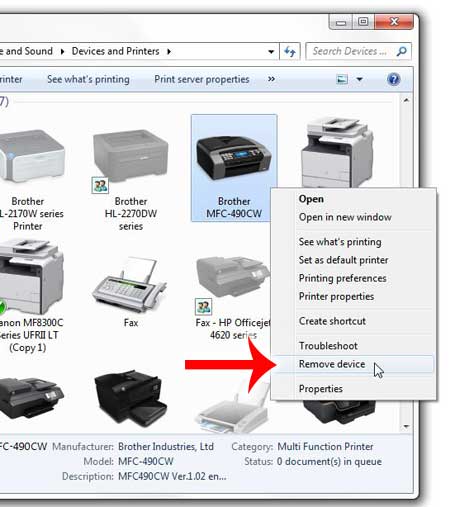
Step 4: Right-click the printer, then click Remove Device .
Step 5: Click the Yes option to confirm that you want to remove the printer. Don’t close this window just yet, though.
At this point the printer is removed from your computer, and you will no longer be able to print to it. For a lot of people, this is a sufficient stopping point. But the driver is still on the computer, and if you have been trying to re-install the printer but keep encountering an error, then it could be an issue with the driver. So you can follow the steps below to delete the print driver as well.
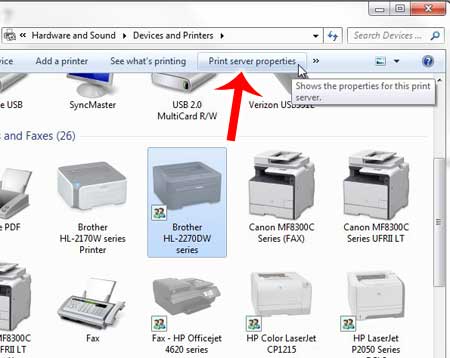
Step 6: Click another printer icon once to select it, then click the Print Server Properties option in the blue bar at the top of the window.
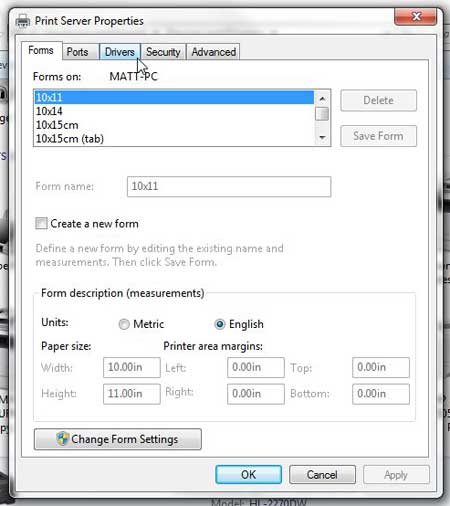
Step 7: Click the Drivers tab at the top of this window.
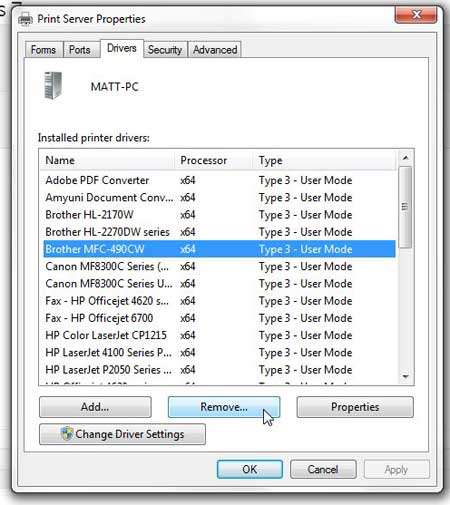
Step 8: Click the driver for the printer you just removed, then click the Remove button .
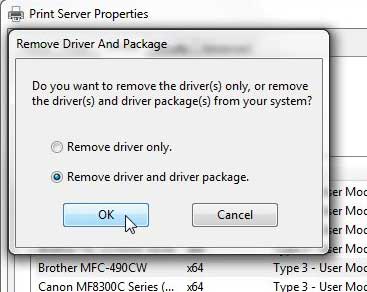
Step 9: Click the Remove driver and driver package option, then click the OK button.
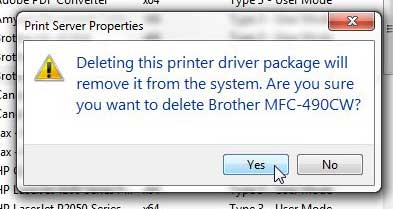
Step 10: Click the Yes button to confirm that you want to delete the driver and driver package.
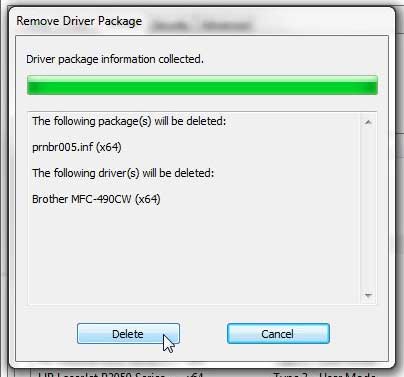
Step 11: Click the Delete button to complete deletion of the printer driver.
You might get an error at this point saying that the driver is in use and that it cannot be deleted. This can occur if there is a document that is still stuck in the print queue , so we need to take a couple more steps.
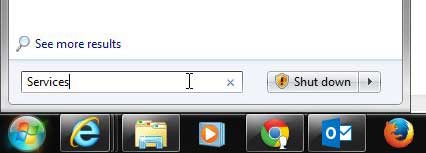
Step 12: Click the Start button at the bottom-left corner of your screen again, type “ Services ” into the search bar at the bottom of the menu, then hit Enter on your keyboard.
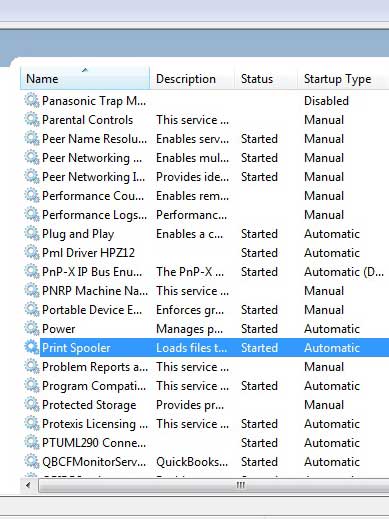
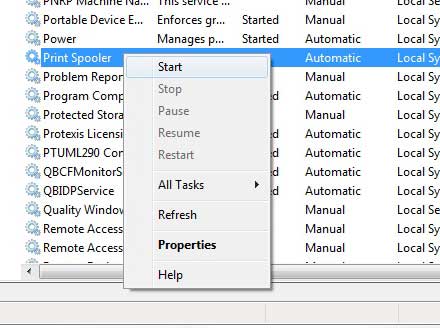
Step 13: Scroll down and select the Print Spooler option.
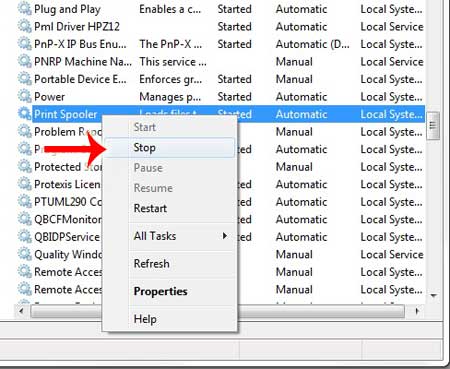
Step 14: Right-click on Print Spooler , then click the Stop option. Leave this window open for now.
Step 15: Click the Start button at the bottom-left corner of the screen, then click Computer in the column at the right side of the window.

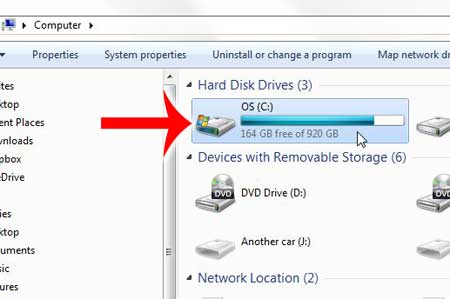
Step 16: Double-click your hard drive at the center of the window.
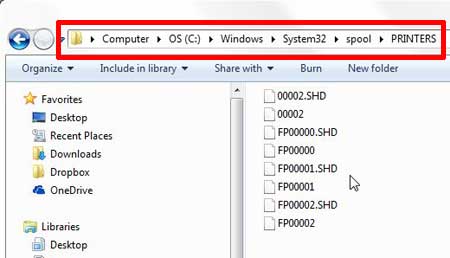
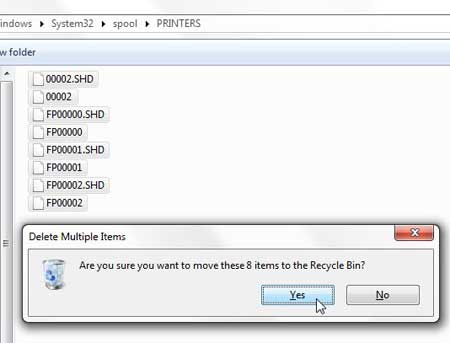
Step 17: Double-click the Windows folder, double-click System32 , double-click spool , then double-click PRINTERS . So the location you want to be at now is C:\Windows\System32\spool\PRINTERS , which should look similar to the image below.
Step 18: Press Ctrl + A on your keyboard to select everything in this folder, press the Delete key on your keyboard (the actual key that says “Delete” or “Del”. Not the “Backspace” key), then click Yes to confirm that you want to delete these files.
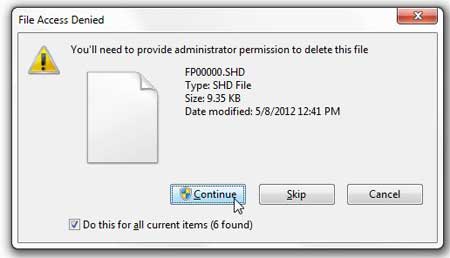
Step 19: Click Continue and provide Administrator access to confirm that you want to delete these files.
Step 20: Return to the Services window that we left open in Step 14, scroll to Print Spooler , right-click it, then click Start .
Step 21: Return to the Devices and Printers window that we left open all the way back in Step 5.
Step 22: Repeat Step 6 – Step 11 to delete the printer driver. The error telling you that it was in use should now be gone.
If you are still unable to delete the printer driver, then restart your computer, and repeat steps 6-11 one more time. If the driver is deleting but the driver package remains, then there may be another user on your computer that has the printer installed on their profile. You will also need to delete the printer and the driver for those users as well.
If you are still experiencing problems, then you should contact your printer’s manufacturer for additional troubleshooting steps related to that specific printer model.
If you’re getting rid of a problematic printer and are in search of a good new one, the Brother HL-2270DW could be the right printer for you. It is a wireless black and white laser printer that is fast, easy to use, and affordable. Check it out here .
Matthew Burleigh has been writing tech tutorials since 2008. His writing has appeared on dozens of different websites and been read over 50 million times.
After receiving his Bachelor’s and Master’s degrees in Computer Science he spent several years working in IT management for small businesses. However, he now works full time writing content online and creating websites.
His main writing topics include iPhones, Microsoft Office, Google Apps, Android, and Photoshop, but he has also written about many other tech topics as well.
Read his full bio here.
