Printing multiple files at once in Windows 11 is a handy trick for saving time and increasing productivity. Instead of opening each file individually, you can select the files you need and send them to your printer in one go. This process involves selecting the files in File Explorer, right-clicking, and choosing the print option. It’s a straightforward task that can be done in just a few clicks, helping you streamline your workload.
How to Print Multiple Files at Once Windows 11
To print multiple files at once in Windows 11, follow these simple steps. This method will enable you to select several documents and print them in a batch, saving you the hassle of opening and printing each file individually.
Step 1: Open File Explorer
Open File Explorer by clicking on the folder icon in the taskbar or pressing the Windows key + E.
File Explorer is your gateway to all the documents and files on your computer. It’s like your digital filing cabinet. Navigate to the location where your files are stored.
Step 2: Select the Files
Hold down the Ctrl key and click on each file you want to print.
Holding the Ctrl key lets you select multiple files. If your files are in a sequence, you can click the first file, hold down the Shift key, and click the last file to select all in between.
Step 3: Right-Click on the Selected Files
Right-click on any of the highlighted files to open a context menu.
The right-click menu is like a magical toolbox that gives you various options for your files. Here, you’ll find the option to print.
Step 4: Choose Print from the Context Menu
Select the “Print” option from the context menu.
Choosing print will send the selected files to your default printer. Make sure your printer is on and connected to your computer.
Step 5: Confirm Print Settings
Check your printer settings to ensure everything is set as desired.
Sometimes, adjusting settings like paper size or print quality is necessary. Make sure these are correct before hitting the final print button.
After completing these steps, your printer will start printing the selected files. You’ll see them coming out one by one, and depending on the speed of your printer, it might take a little time to finish. You’ll have all your documents printed without the need to open them individually, saving you both time and effort.
Tips for Printing Multiple Files at Once Windows 11
- Ensure that all files are in a printable format, such as PDF or Word.
- Verify that your printer is connected and has sufficient ink and paper.
- Group files in a dedicated folder for easy selection.
- Use the print queue to manage and reorder files that are being printed.
- Regularly update your printer drivers to avoid compatibility issues.
Can I print files of different types at once?
Yes, you can print different types of files, but ensure your printer supports all file formats.
What if my printer doesn’t start printing?
Check if the printer is connected and has enough ink and paper. Restarting the printer might also help.
Can I preview files before printing?
Yes, you can open each file to preview, but it needs to be done before selecting the print option.
How do I cancel a print job if something goes wrong?
Open the print queue and cancel the print job from there.
Is there a limit to how many files I can print at once?
While there’s no strict limit, printing too many files at once may slow down your computer or printer.
Summary
- Open File Explorer.
- Select multiple files with Ctrl.
- Right-click selected files.
- Choose Print.
- Confirm print settings.
Conclusion
Printing multiple files at once in Windows 11 is an efficient way to handle large batches of documents quickly. By using this method, you avoid opening each file separately, which means less clicking and more productivity. This process can be a game-changer, particularly if you frequently work with numerous documents. Mastering this skill will save you time and reduce frustration, making your workflow smoother and more efficient.
For those who often find themselves overwhelmed by stacks of documents needing printing, this method offers a sigh of relief. It’s like having an assistant who organizes your files and sends them off to the printer with just a few clicks. As you become more familiar with this technique, you’ll wonder how you ever managed without it.
To get the most out of this capability, ensure your printer is always up-to-date with drivers and adequately supplied with paper and ink. Regular maintenance will ensure smooth operation and prevent hiccups during your printing tasks. Embrace this method and watch your productivity soar, leaving you with more time to focus on other critical tasks.

Matthew Burleigh has been writing tech tutorials since 2008. His writing has appeared on dozens of different websites and been read over 50 million times.
After receiving his Bachelor’s and Master’s degrees in Computer Science he spent several years working in IT management for small businesses. However, he now works full time writing content online and creating websites.
His main writing topics include iPhones, Microsoft Office, Google Apps, Android, and Photoshop, but he has also written about many other tech topics as well.
Read his full bio here.
Featured guides and deals
- Return home
JavaScript is not available.
We’ve detected that JavaScript is disabled in this browser. Please enable JavaScript or switch to a supported browser to continue using x.com. You can see a list of supported browsers in our Help Center.
Help Center

Dengan mengeklik Lanjutkan, Anda menyetujui Perjanjian Pengguna , Kebijakan Privasi , dan Kebijakan Cookie LinkedIn.
Kami telah mengirimkan link sekali pakai ke alamat email utama Anda
Klik link untuk login langsung ke akun LinkedIn Anda.
Jika Anda tidak menemukan email tersebut di kotak pesan, periksa folder spam.
Setuju & Bergabung dengan LinkedIn
Dengan mengeklik Lanjutkan, Anda menyetujui Perjanjian Pengguna , Kebijakan Privasi , dan Kebijakan Cookie LinkedIn.
Printers can be difficult ot work with, and troubleshooting them can take you to a lot of different places on your computer.
One common issue that can arise with a printer is when it says that it is offline, even though it’s turned on and seems to be hooked up correctly.
Our tutorial below will show you some steps to try so that you can learn how to change a printer from offline to online.
How to Switch a Printer from Offline to Online in Windows 7
- Click Start , then Devices and Printers .
- Right-click the printer, then click See what’s printing .
- Select the Printer tab, then click Use printer offline to clear the check mark.
Our guide continues below with additional information on how to switch a printer from offline to online , including pictures for these steps.
If you’re lucky, then this should work and your queued documents will start printing. However, sometimes this isn’t enough and you need to do some more troubleshooting. We discuss those additional troubleshooting steps further in this article.
Printers can be frustrating when they are not working correctly, due largely to the fact that errors can occur for seemingly no reason. Whether your print jobs don’t look right, you are getting constant paper jams, or printing is inconsistent or erratic, printers are often some of the most difficult electronic devices to work with. So if your printer is showing as offline and you can’t print, then you may be trying to figure out why it’s showing as offline when the printer was working before and nothing has changed.
One issue that you might encounter is Windows 7 not being able to connect to your printer to send documents that you want to print. Further investigation into the issue might lead you to discover that Windows 7 thinks the printer is offline.
There are several reasons why this might be occurring, so you will need to follow the instructions in this tutorial to learn how to change your printer from offline to online .
Once your printer is back online, it should then start printing the documents that you have sent to the printer that are currently sitting in your print queue.
How Do You Change a Printer from Offline to Online? (Guide with Pictures)
Windows is recognizing your printer as being offline because it is unable to communicate with the printer. This can be caused by several different situations, so you need to pinpoint exactly from where the problem is originating.
These steps will show you how to change a printer from offline to online from a Windows laptop or desktop computer.
Step 1: Click theStartbutton at the bottom-left corner of your screen, then clickDevices and Printers.
Click Start then choose Devices & Printers .
Step 2: Right-click the printer that is showing as offline, then clickSee what’s printing.
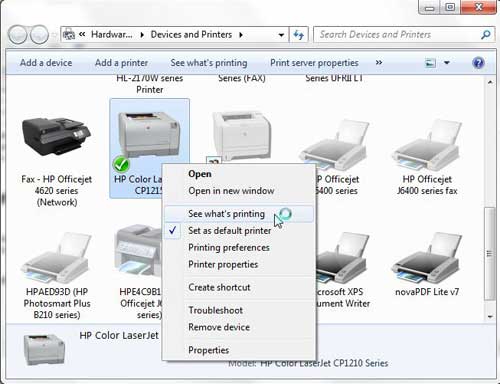
Right-click on the printer, then select See what’s printing.
Step 3: Click thePrinterlink at the top of this window, then click theUse Printer Offlineoption to remove the check mark.
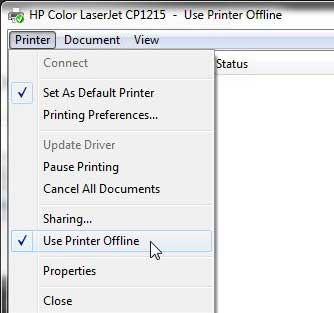
Select Printer , then Use Printer Offline .
Now that you know how to change printer from offline to online you can try this step whenever your computer is unable to print a file.
If this solved your problem, then you are all set and can continue with your printing . However, if this did not resolve the issue, then there are some more troubleshooting steps you can try.
Additional Troubleshooting for an Offline Printer in Windows 7
Check that the printer is turned on, and that the USB cable is properly connected to both the back of the printer and your computer. If your printer is wireless, you may need to restart the printer, then restart your computer to see if you can re-establish the wireless connection.
If you are using a wireless printer, have you recently changed your router, or changed the name of the wireless network ? If so, you may need to update your wireless printer with the new wireless network settings . If your wireless printer does not feature a control panel on the printer that allows you to change the network settings, you may need to temporarily connect the printer to your computer with a USB cable to modify the settings.
If your wired printer is still showing an offline status, despite the fact that it is plugged in and connected to your computer, then there may be a problem with the port to which the device is connected.
How to Change a Printer Port in Windows 7
You can use these steps to change the printer port for a printer that has been set up in Windows 7.
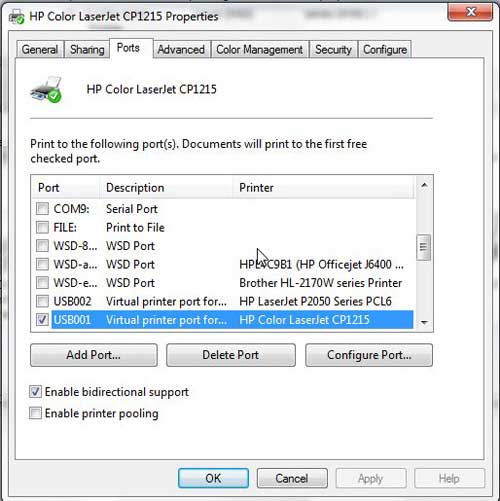
Step 1: Return to theDevices and Printersmenu, right-click your printer, then clickPrinter Properties.
Step 2: Click thePortstab at the top of the window, choose the correct port from the list at the center of the window, clickApply, then clickOK.
If you are still unable to print, then one final option you can attempt is to stop and restart the print spooler . You can follow the instructions in this article to learn how to manage the print spooler.
If you are still unable to print after following all of these instructions, then you may need to uninstall, then reinstall your printer. You can remove a printer from your computer by right-clicking the printer, then clicking Remove device . Once the printer has been uninstalled, follow your printer’s installation guide to properly reinstall it.
Why Is My Printer Offline?
The sections in the article above provide a bunch of different options and settings that you can check in order to see why your printer might be offline.
There are so many potential reasons that your printer might be offline that it’s hard to point to one specific reason why it might be happening.
In my experience, the best, simplest, and most useful thing that you can do when your printer is showing as offline is to simply restart the printer.
This can resolve issues related to a wireless printer that isn’t connected to a network, it can force the print spooler to restart, and it can fix print jobs that are stuck in the print queue.
While your printer is going through the process of restarting it can be helpful to restart your computer, too. And if you have a wireless printer and have been experiencing connection issues with other wireless devices as well, then even restarting your modem and your router might not be a bad idea.
How do I restart a printer?
You can reboot your printer by pressing the Power button on the printer, waiting until it has completely turned off, then pressing the Power button again to turn it back on.
How can I check my printer status?
If you aren’t sure whether or not your printer is in Printer Online or Printer Offline mode in Windows 11, then a quick way to check is to go to Start > Settings > Devices > Printers & Scanners .
You can then click on your printer and choose the Open Queue option. When you open print queue windows on your computer you can see any documents that are currently queued up to print.
When the printer window is open you can click the Printer option in the menu bar, then make sure the Use Printer Offline option isn’t selected.
How can I change the printer driver that my printer is currently using?
If you go to Start > Settings > Devices > Printers & Scanners then select your printer, you can click the Printer properties button, which will open a new window.
In this window you can choose the Advanced tab, then click the Driver drop down menu and choose a different driver. You could also click the New Driver button, which will launch the Add Printer Driver Wizard .
How do I run printer troubleshooter in Windows 11?
If you aren’t sure what the problem is, you can try the Windows utility that will cycle through a bunch of potential settings to try and fix the problem.
This means it will do things like restart printer related services, such as restarting the print spooler service and checking for outdated printer drivers.
You can do this by clicking the Windows button in the taskbar, searching for “Printer” then selecting the Printers & scanners option.
You can then select your printer and click the Run the troubleshooter option.
Why is my HP Printer offline?
The Hp printer offline Windows 11 steps are the same for Hewlett Packard printers as they are for other printers.
You need to open the Windows Settings menu, choose Bluetooth and devices, then select Printers & scanners.
You can then click on the default printer or whatever printer you want to check, then make sure Use printer offline is not selected.
If it is offline and clicking that option doesn’t put it back online, then you will need to go through the troubleshoot printer offline process of checking the printer cable (or the network status for wireless printers) and restarting the printer and the computer.
If that doesn’t work, then you may printer offline – how to put online instructions on the printer manufacturer’s website, which may involve reinstalling printer software and drivers.
Matthew Burleigh has been writing tech tutorials since 2008. His writing has appeared on dozens of different websites and been read over 50 million times.
After receiving his Bachelor’s and Master’s degrees in Computer Science he spent several years working in IT management for small businesses. However, he now works full time writing content online and creating websites.
His main writing topics include iPhones, Microsoft Office, Google Apps, Android, and Photoshop, but he has also written about many other tech topics as well.
Read his full bio here.
While printers are becoming much easier to install and use in newer Windows operating systems, they can still be a large source of frustration for many people.
The combination of drivers, moving printer parts, print queues, and everything else that is involved with a printer can make it difficult to pinpoint the exact problem.
Our general printer troubleshooting guide below can walk you through a couple common issues that you should check if your printer isn’t working properly and you aren’t sure why.
We have written about working with several specific models of printers, such as the HP Officejet 4620 and the Officejet 6700, but there are so many different models of printers on the market, with so many different issues, that what works for one printer might not work for another.
So if you have a printer that is giving you problems on your Windows 7 computer, then there are a few steps that you can try which might work for any printer.
Note that each additional step under the sections below should only be tried if the previous step did not work.
If one of the steps has resolved your issue, then you do not need to continue with the rest of the steps in the section.
Additionally, these are generalized guidelines, that are meant to be effective for a wide range of printers. Individual printer models all work differently, so there may be some specifics about your printer that are not mentioned below.
This includes things such as exact locations of commands on Print menus, and physical characteristics and properties of the machine.
You can check out our printer offline Windows 7 article if your printer is currently showing as offline even though it seems to be hooked up properly.
Problem: I sent a document to the printer, but it’s not printing.
Troubleshooting steps (Note that each additional step in this section should only be tried if the previous step did not work. If one of the steps has resolved your issue, then you do not need to continue with the rest of the steps in the section):
Confirm that the printer is turned on.
Is the printer connected to the computer? Be sure to check both ends of the cable. If the printer is connected wirelessly, then make sure that the printer and the computer are both connected to the same wireless network. The method for connecting wirelessly will vary from model to model, so you may need to find the specific documentation for your printer. This article , for example, shows how to connect an HP Officejet 4620 to a wireless network.
Turn the printer off, wait ten seconds, then turn it back on.
Click the Start button at the lower left corner of the screen, click Devices and Printers , then right-click your printer and choose the See what’s printing option. If there is something there, then click the Printer option in the menu bar and choose the Cancel All Documents option. You will then need to re-send the document to the printer.
Stop and restart the print spooler. This option is a little more complicated, so you will need to read this article to learn how to do it.
Turn off the printer, turn off the computer, restart the computer, then restart the printer.
Are you trying to print labels, or on a paper size that is different than the default size for your printer? If your printer has a manual feed tray, then the computer may be trying to send the document to that tray instead. Try putting the paper in the manual feed tray and see if that causes the document to print.
Uninstall the printer, disconnect the printer cable from the back of your computer, then re-install the printer.
Problem: Documents are printing with spaces, missing colors, and general errors.
Troubleshooting steps (Note that each additional step in this section should only be tried if the previous step did not work. If one of the steps has resolved your issue, then you do not need to continue with the rest of the steps in the section):
Clean the printheads (inkjet printers), or run maintenance utilities (laserjet printers). Note that the specific ways to perform these operations will vary depending upon your printer model. If you are having print quality issues, then you should find the manual or troubleshooting guide to determine the necessary steps for resolving print quality issues for your specific printer model.
Open your printer and check the printer cartridges for any physical defects.
Replace printer cartridges. Printer ink can dry out if you do not use your printer very often.
Problem: Printer is showing as offline, but it is turned on and connected.
Troubleshooting steps (Note that each additional step in this section should only be tried if the previous step did not work. If one of the steps has resolved your issue, then you do not need to continue with the rest of the steps in the section):
Turn the printer off, then turn it back on again. Sometimes a printer will enter a sleep or hibernation mode and the computer won’t recognize it when it wakes up.
Unplug the printer cable from the back of the computer, wait ten seconds, then plug it back in again.
Click Start , click Devices and Printers , then right-click the printer and click Printer Properties . Click the Ports tab at the top of the window, make note of the USB port that is currently selected, then select a different USB port. Click Apply , then click OK . Check to see if the printer is still showing as Offline. If so, repeat this step, but with a different port.
Uninstall the printer, disconnect the printer cable, then re-install the printer. If you are still having problems, then there may be an issue with old print drivers. You can read this article to learn how to remove old print drivers.
Problem: My printer is printing everything very small or very big.
Troubleshooting steps (Note that each additional step in this section should only be tried if the previous step did not work. If one of the steps has resolved your issue, then you do not need to continue with the rest of the steps in the section):
- Try printing something from a different program. For example, if everything is printing small from Internet Explorer, then open Notepad or Microsoft Word and see if it is still printing small. If Word or Notepad prints correctly, then the print scale in Internet Explorer may have been changed. You can open Internet Explorer, click the gear icon at the top-right of the screen, click Print , then click Print Preview . Click the size drop-down menu at the top of the window and select a larger zoom level, such as 100%. Try and print the document again to confirm that it is now printing at the correct size.
Note that most popular programs have a scale option on the Print screen, so you will need to find this option if other programs are able to print at the correct size. Additionally, programs like Microsoft Word and Excel can have scaling that applies on a per-document basis. This means that one document might be configured to print at a 50% scale, while others might be set to print at the default 100% scale.
- Click the Start button, click Devices and Printers , then right-click your printer and click the Printing Preferences option. The exact steps from here will vary based on your specific printer model, but there should be a “Zoom” or “Scaling” option. Change this to 100%, then click the Apply or OK button to confirm your changes.
Problem: My printer is printing everything in black and white.
Troubleshooting steps (Note that each additional step in this section should only be tried if the previous step did not work. If one of the steps has resolved your issue, then you do not need to continue with the rest of the steps in the section):
Confirm that you have a color printer.
If you have a color printer, then confirm that there are color cartridges installed.
Check the ink levels of your printer cartridges to confirm that the color cartridges are not depleted.
Try and print a document, but check the settings on the Print menu before you click the Print button . Check for a color or black and white option, and make sure that the black and white option is not selected. The exact steps for this will vary based on the program and the printer being used. If you do not see an option like this on the default screen, then click the Advanced tab and check for this setting there.
Click the Start button, click Devices and Printers , then right-click your printer and choose the Printing Preferences option. Look for a Color Mode option on one of the tabs and confirm that the Color option is selected.
Additional troubleshooting steps
You can print a test page to confirm that your printer is set up properly. Click the Start button, click Devices and Printers , then right-click your printer and choose the Printer Properties option. Click the Print Test Page option near the bottom of the window. If the test page does not print, then you will need to follow the steps above to resolve an issue where documents are not printing.
If you have a paper jam, open the paper tray and check for any visual jams there. If you do not see anything, then check the back of the printer to see if there is an additional access door there. If so, open this access door and check there for a paper jam. If there is nothing there, then open the ink compartment and check to see if there is any jammed paper that can be accessed from there. If you still do not see anything, then try turning off the printer and turning it back on.
If your printer has a touchscreen or display, then check it for any error messages. If there is an error message, try and resolve it using the on-screen steps. If not, then search online for the identified issue and your printer model.
Are you printing to the correct printer? It is not uncommon to have many printers installed on the same computer, and certain programs may try to send a document to the incorrect printer. You should also confirm that the correct printer is selected as your default printer. You can set a default printer by clicking the Start button, clicking Devices and Printers , then right-clicking your printer and selecting the Set as default printer option. You can read this article for additional instructions on setting a default printer in Windows 7.
If nothing is working to resolve your print issue, then the best option may be to completely uninstall your printer, then install it again. This article will walk you through the process.
This article from Microsoft can provide additional help in identifying any issues that you may be having with your printer.
Additional Sources
Matthew Burleigh has been writing tech tutorials since 2008. His writing has appeared on dozens of different websites and been read over 50 million times.
After receiving his Bachelor’s and Master’s degrees in Computer Science he spent several years working in IT management for small businesses. However, he now works full time writing content online and creating websites.
His main writing topics include iPhones, Microsoft Office, Google Apps, Android, and Photoshop, but he has also written about many other tech topics as well.
Read his full bio here.
Smartphones and mobile devices like the iPhone have become so capable and powerful that they can perform many of the same functions as a desktop or laptop computer.
Therefore you might be wondering how to add a printer on your iPhone 11 so that you can print a file directly from the device.
If you were an early adopter of cell phones or even the first smartphone options, then you may have become so accustomed to avoiding printing that you may not have tried it in a while.
Printing from mobile devices used to be difficult, if not impossible, so many users simply chose to keep printing only from their computers.
But the prevalence and market dominance of mobile devices has increased so much that printing was something that needed to be addressed.
This happened with a feature called AirPrint that makes it much easier for iPhones to communicate with printers over a wireless printer.
Our guide below will show you how to add a printer to your iPhone 11 and how to complete a print job from the device.
How to Add an iPhone Printer
- Open an app or file to print.
- Tap the Share button.
- Choose Print .
- Tap Select Printer .
- Touch the printer you wish to use.
- Change print job settings as needed.
- Tap Print .
Our article continues below with additional information on how to add a printer on an iPhone, including pictures of these steps.
How to Use a Printer from an iPhone (Guide with Pictures)
The steps in this article were performed on an iPhone 11 in iOS 14.6. This section assumes that you have an AirPrint-enabled printer that is already setup up to use AirPrint over your wireless network.
Step 1: Open the app with the file you want to print, or open the specific file.
Step 2: Touch theShareicon (the one with the square and an upward pointing arrow.)
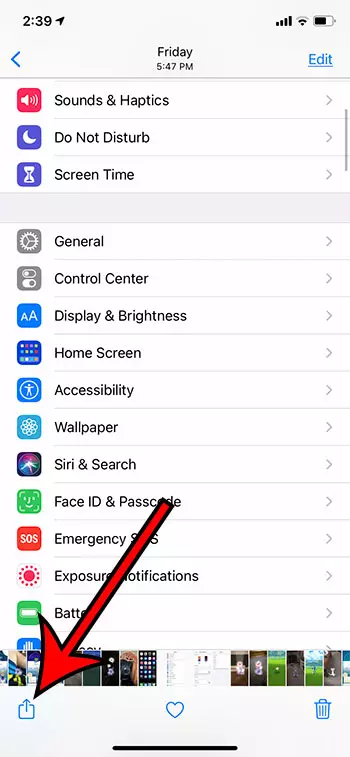
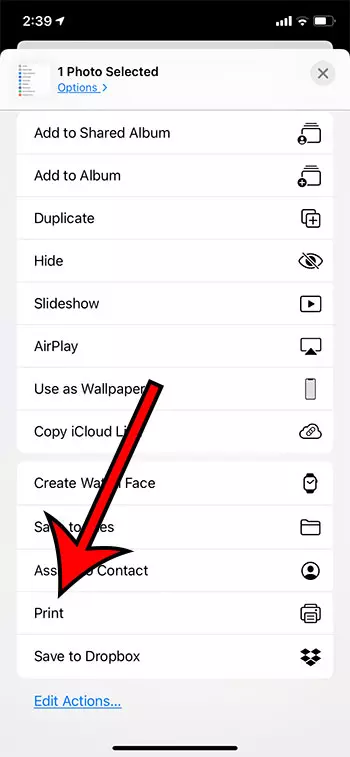
Step 3: Choose thePrintoption.
You may need to scroll down a little bit to find this option.
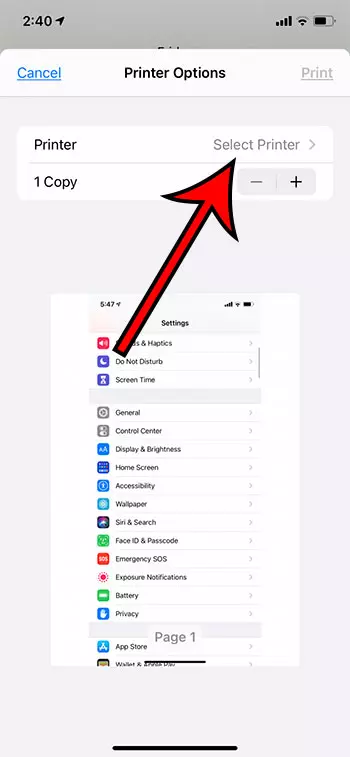
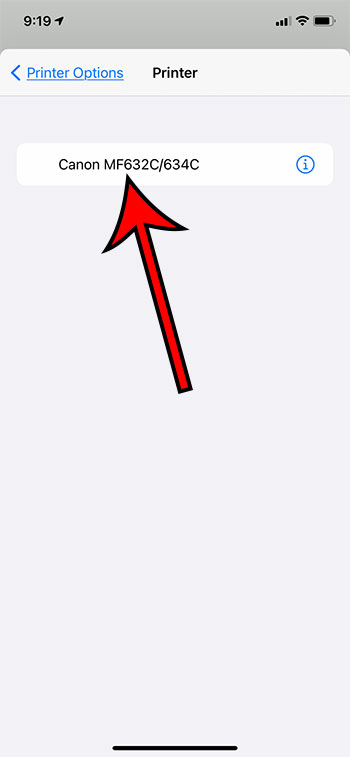
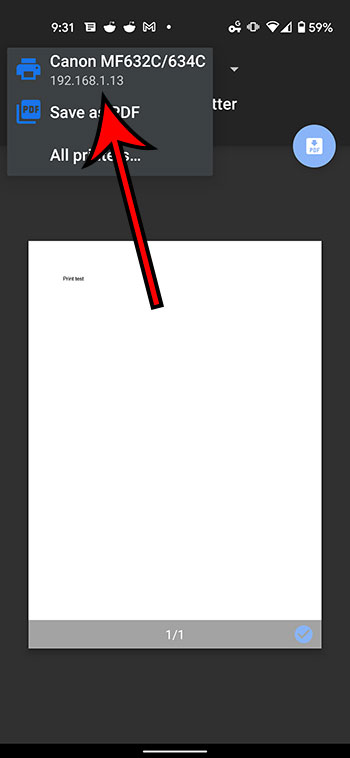
Step 4: Tap theSelect Printerbutton.
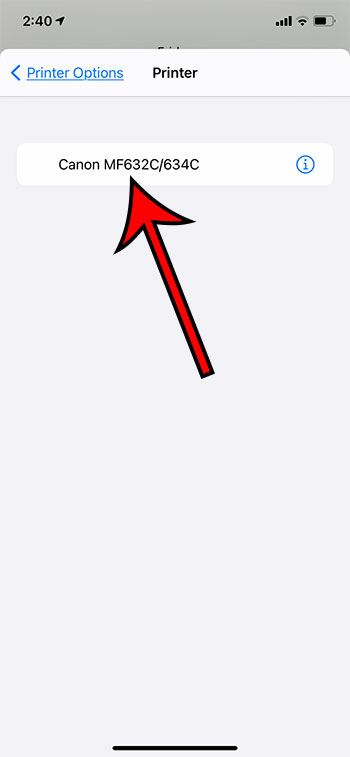
Step 5: Choose the printer that you would like to add and print from.
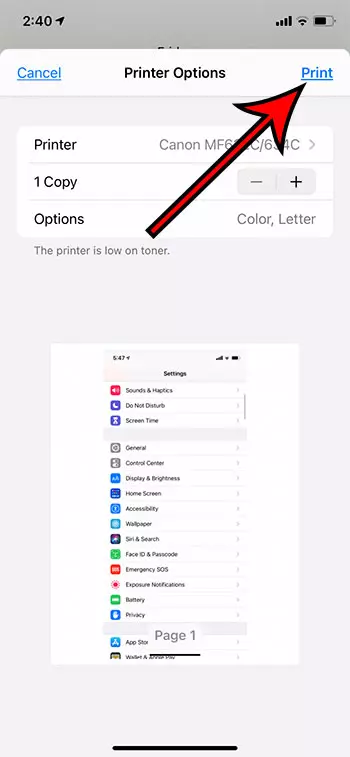
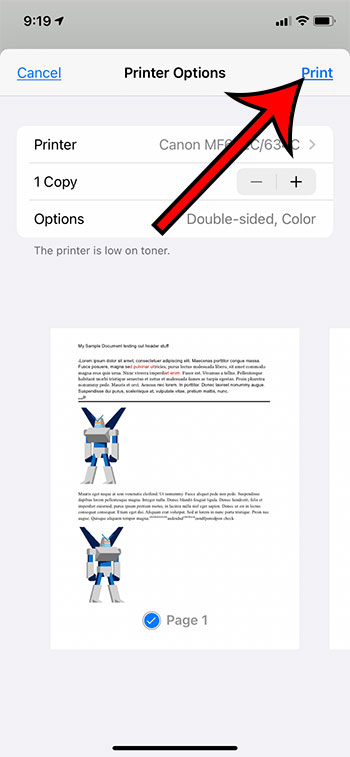
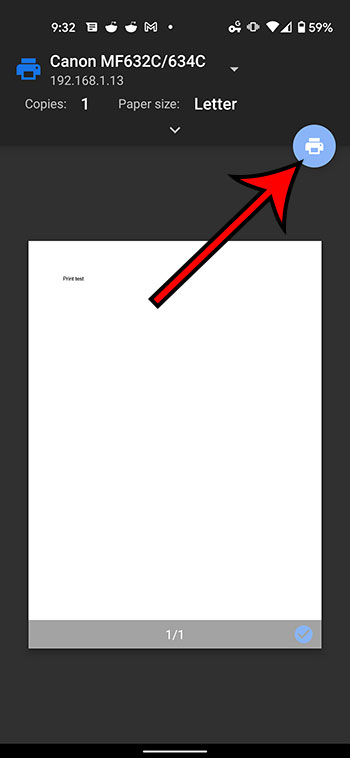
Step 6: Adjust any of the additional options on this print menu like the number of copies, then tapPrintat the top right corner of the screen.
Now that you know how to print from an iPhone you will be able to create physical copies of documents without needing to involve a laptop or desktop computer in the process.
What is Airprint?
The AirPrint feature is one that was rather uncommon and mysterious a decade ago but has become much more common and popular. In fact, most new wireless printers are now compatible with AirPrint, as it is such an important feature.
AirPrint is a wireless protocol that Apple takes advantage of to allow their device to print wirelessly. Most printers will need to install their own drivers on a computer in order to print, but the AirPrint feature is kind of a universal driver that any iPhone, iPad, or iPod Touch can use to print without needing to go through the headache of actually installing the files for a printer on to the device.
How to Print from an iPhone
If you are used to printing from a computer and haven’t yet had to try this from a device that uses iOS, then it’s a little tricky the first time.
Your iPhone lumps the printing option in with other sharing options, such as sending data through a text message or an email. Therefore, you need to open the Share menu from within the app or file which you want to print.
Step 1: Open the app or file.
Step 2: Tap the Share icon.
Step 3: Choose the Print option.
Step 4: Select the printer and adjust the other print settings, then tap the Print button.
Note that you will need to be connected to the same wireless network as the printer that you want to use for this print job.
Most of the items that you would want to print from a default iPhone app are going to use this “Share” method to print the file. However, you might need to follow some different steps to print from within other apps. For example, to print from Google Docs on an iPhone you would open the document, tap the three dots at the top-right, choose Share & export , then tap Print .
How to View or Cancel a Print Job on an iPhone
When you create a print job on your iPhone it is handled through an app called the Print Center. If the print job is just a single page then the printing process can occur very quickly, and you probably won’t be able to view or cancel that job.
But if the document that you are trying to print has a lot of pages, or if you are printing a lot of copies, then you might be able to view or modify it.
You can open the Print Center from the App Switcher. On older iPhone models you can open the App Switcher by pressing the Home button twice. On newer iPhone models you swipe up and to the left or right from the bottom of the Home screen.
You can then select the Print Center app and either look at the print job or tap the Cancel Printing button to cancel the print job.
How to Print To a Printer Without AirPrint from an iPhone (Using an App)
The specifics of this method are a little generic, as these steps will depend on the brand of printer. But, generally speaking, you are going to need to download an app to your iPhone for your printer, enable the Wi-Fi option on your printer, then connect to the network that the printer creates through your iPhone.
- Open the App Store .
- Search for your printer’s app. (Not all printers are going to have a dedicated app. Consult your printer’s documentation to see if this option is available.)
- Download and install the app.
- Enable Wi-Fi on your printer so that the printer is broadcasting its wireless network.
- Open the Settings app on your iPhone.
- Choose the Wi-Fi option.
- Select the printer’s Wi-Fi network and enter the password if prompted.
- Open the file that you want to print.
- Tap the Share icon.
- Select the Print option.
- Choose the printer.
- Tap Print .
Alternatively, you might open the printer app instead, then browse through your iPhone’s files through the app and send them to the printer that way.
If you can’t use an app or AirPrint for your printer then you might be able to use a USB solution. Note that this will likely require you to purchase some additional equipment.
Can You Print from Your iPhone to a Printer Without a Wi Fi Network?
Yes, this is possible, but it is going to require some additional steps and equipment. The iPhone is a wireless device, o its default method of connection is going to rely on wireless connectivity.
The section below discusses how to establish a wired connection between a printer and the iPhone using the USB port on the back of the printer and the Lightning port on your iPhone.
How to Use a USB Cable to Print from an iPhone to a Non AirPrint Printer
- Connect the USB end of the cable to the port on the back of the printer.
- Connect the other end of the cable to the iPhone’s lightning port.
- Confirm the device connection on your iPhone.
- Open the file you want to print.
- Tap the Share icon.
- Choose the Print option.
- Touch the Select Printer button.
- Select the USB-connected printer.
- Tap the Print button.
More Information on How to Add Printer to iPhone 11
While you can often get good prints from files, images, or other objects that you print from your iPhone, I have found that the prints typically look better when printed from a computer.
Often this is due to scaling, but it can also come from the fact that AirPrint can occasionally have some compatibility issues with combinations of phones and printers.
The different settings that are available on the print options menu can include things like the number of copies, color options, or a range selection.
These options aren’t always available for everything, though, so you might need to experiment with opening the file in different apps if you need to switch between black and white or color, for example.
Some printers that aren’t compatible with AirPrint, or aren’t wireless, can employ an email-based solution for printing.
Essentially what you are doing is assigning an email address to your printer, then you are sending the file that you want to print to that email address.
Since you can create and send emails with the Mail app on your iPhone, this can be another convenient option for printing from the device. Consult your printer’s manual for more information on setting up this feature, as its availability and functionality will vary between printer models.
One final thing to consider is setting up a wireless print server for your wired printer.
While this can be complicated and more expensive than simply purchasing a new, wireless printer, it can solve your printing issue.
Establishing the connection to that printer may involve some additional steps, but they are much more approachable when wireless capability has been added to the printer.
Matthew Burleigh has been writing tech tutorials since 2008. His writing has appeared on dozens of different websites and been read over 50 million times.
After receiving his Bachelor’s and Master’s degrees in Computer Science he spent several years working in IT management for small businesses. However, he now works full time writing content online and creating websites.
His main writing topics include iPhones, Microsoft Office, Google Apps, Android, and Photoshop, but he has also written about many other tech topics as well.
Read his full bio here.
Featured guides and deals
If you’re used to working with printers frequently, you have probably faced situations where your machine is ready to print, but the printer status on your Windows 10 is showing offline.
This can happen due to minor network connectivity issues, poor printer connection, paper jams, or other problems.
Whatever the reason is, you should know how to get a printer online in Windows 10 to fix the problems and get your work done.
To make the task easier for you, we will discuss a number of methods of solving the printer offline issue and tell you some simple tricks to avoid such problems in the future.
We will cover it all, from minor paper jam problems to complex setting issues. So, let’s dive right in.
How to Use the Windows 10 Printer Troubleshooter to Get the Printer Online
- Press the Windows key + I to open Settings.
- Choose Devices in the left column.
- Select Printers and Scanners .
- Choose to run the troubleshooter.
- Let the troubleshooter run and perform the suggested tasks.
Our guide continues below with additional information on getting your Windows 10 printer online, including some other options that you can try which might help to resolve the situation.
Sometimes you will need to send someone a picture of the items that appear on your screen. Our article on how to screenshot on Acer laptops can help you with that.
How to Solve Windows 10 Printer Offline Issues – 10 Options
As you already know, your computer can show that your printer is offline for many reasons. Some problems are so trivial that you can solve them within moments, even without any printer technician. Below are some effective and detailed methods to solve the printer offline error yourself:
Method One – Perform Physical Checks
To bring back a printer online, you should properly check all the wire connections. If your machine is a local printer or a network printer and needs to be connected by a USB cable or Ethernet cable, you should check out whether the connection is firm or not. Try checking out the cable at both ends of your USB port and printer.
If the cable is too loose or broken, replace it with a new one. Also, try to use multiple USB ports on your computer to make sure that the problem isn’t in your cable, ethernet port, or USB ports.
Method Two – Check Your Internet Connection
If you have connected your printer using a Wi-Fi network, check out if the device’s network is working properly. The printer’s status might go offline if the network is too slow or if the network keeps dropping.
So, check out the condition of the network from the built-in options of your printer. If you don’t know how to connect your printer through Wi-Fi, look for instructions in your owner’s manual. Sometimes the printer status goes offline when you try to connect it using a VPN (virtual private network.)
In that case, you must disconnect the VPN connection and restart your printer. Otherwise, you can also try a more efficient VPN connection and adjust the VPN configuration to access the local network.
Method Three – Restart Your Printer and Computer
The process of restarting your devices is called power cycling. It’s a very common technique to solve minor glitches in your devices – power off both your PC and printer first. Then disconnect your printer from the computer and unplug its power cable.
Wait for 30 seconds before restarting the printer. When your printer is switched on, turn on your computer again and check if the offline status is turned online.
Method Four – Use Printer Offline Option
If our previously mentioned methods fail to solve your printer problems, it’s time to do some work manually. You need to open settings on your computer and make some necessary changes to the printer offline option. And here’s how to use the printer offline option in Windows 11 –
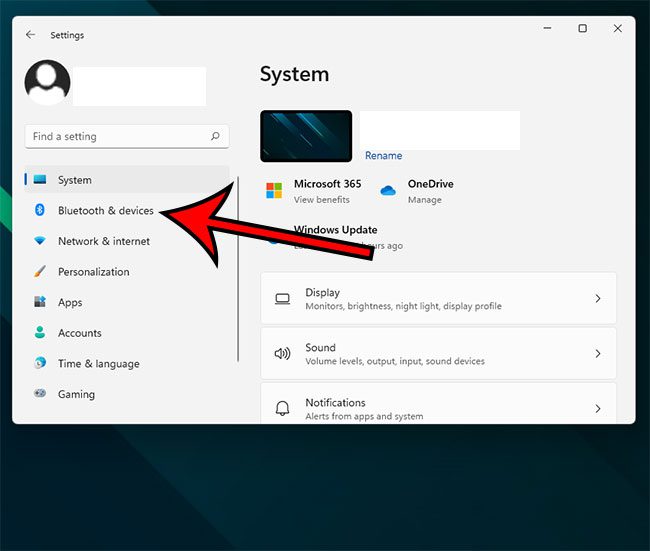
Step 1) On your windows computer, click on the ‘Start’ option from the bottom of your screen. From there, click on the ‘Settings’ option and then ‘Bluetooth and devices.’
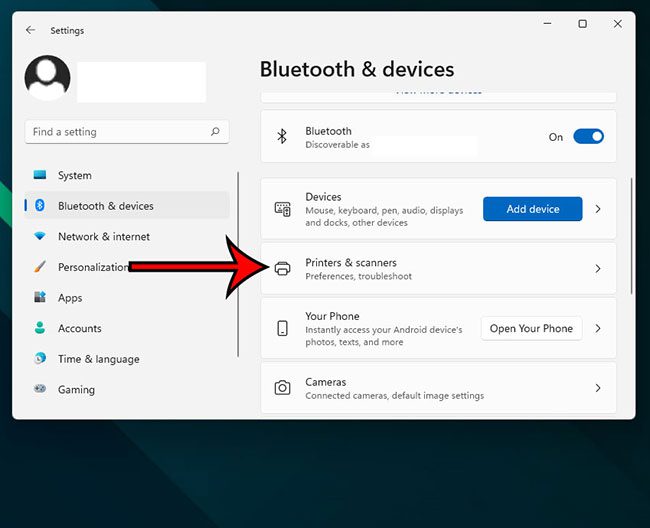
Step 2) Now select the option called ‘Printers & Scanners’.
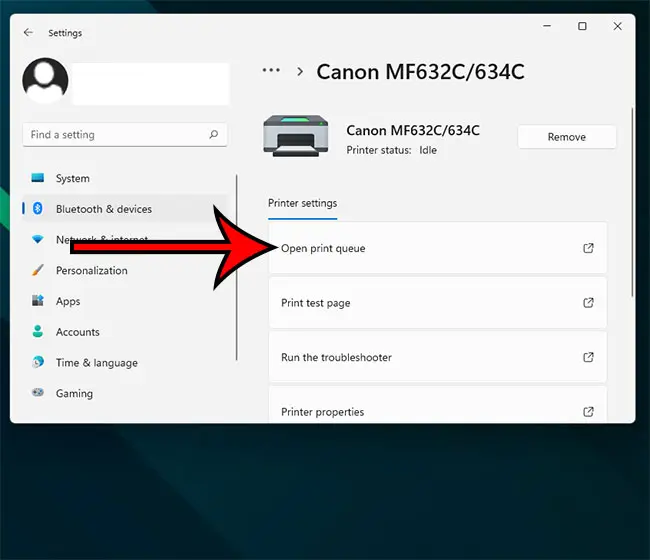
Step 3) Select your printer and choose the ‘Open print queue’ option.
Step 4) A new page will appear, and you need to look for the ‘Printer’ tab on the toolbar. Click on it, and a drop-down menu will arrive. Do you see any ‘Use Printer Offline’ option there? Check out if there’s a tick beside this option. Click on it to remove the tick mark and get your printer online.
<img loading=“lazy” src=“https://www.solveyourtech.com/wp-content/uploads/2022/02/how-to-get-printer-online-windows-10-4.jpg" onerror=“this.onerror=null;this.src=‘https://blogger.googleusercontent.com/img/a/AVvXsEhe7F7TRXHtjiKvHb5vS7DmnxvpHiDyoYyYvm1nHB3Qp2_w3BnM6A2eq4v7FYxCC9bfZt3a9vIMtAYEKUiaDQbHMg-ViyGmRIj39MLp0bGFfgfYw1Dc9q_H-T0wiTm3l0Uq42dETrN9eC8aGJ9_IORZsxST1AcLR7np1koOfcc7tnHa4S8Mwz_xD9d0=s16000';" alt=“turn off the “use printer offline” option - 17”>
For additional coverage of this topic, you can read our printer offline Windows 7 guide.
Method Five – Use Printer Troubleshooter
If the status of your printer keeps coming online briefly and going offline again, you can use a printer troubleshooter to solve the problem and start printing again. In fact, Windows 10 features several troubleshooters to solve the printer offline issues automatically. Here’s how you can perform troubleshooting –
Step 1) Use the dedicated Windows key to open the ‘Start’ menu and go to your settings. You can also press Windows key + I to open the Settings app directly. Click on ‘Devices’ and then on ‘Printers & Scanners.’
Step 2) Click on the ‘Run the troubleshooter’ option from the right-pane. You can find it right beneath the ‘Related Settings’ option.
Step 3) Now, the troubleshooter will run several series of checks. It will also suggest to you some ways to solve the detected problems. It might ask you to set your current printer as a default printer or ask you to update your printer driver. Act accordingly to fix the problems.
Method Six – Clear Your Pending Print Jobs
It’s always preferable to perform one print job at once. When you continue printing for a long time and multiple unfinished print jobs are queued, it might cause printer offline errors. Follow the steps given below to remove the print queue –
Step 1) Open settings and choose ‘Devices.’ Then select ‘Printers & Scanners’ and click on your printer’s name.
Step 2) Now click on ‘Open queue’ to get the list of all the pending documents. Select the ‘ Printer ‘ option from the toolbar at the top and then click ‘Cancel All Documents.’ It should clear all the pending jobs.
Step 3) You can restart your printer and your computer to clear the remaining documents of the print queue.
Method Seven – Use Print Spooler Service
The print spooler service controls the interactions between your computer and printer. You can restart the service to get the printer online. Here’s how you can do it –
Step 1) Open your computer’s start menu, type ‘Services’, and press enter. You can also press Windows Key + R and search by typing ‘Service.msc.’
Step 2) Look for the ‘Print Spooler’ option and right-click on it. Then choose ‘Restart,’ and your offline printer will go online again.
Method Eight – Change Printer Properties
Step 1) Open the control panel of your printer and then go to ‘Devices and Printers.’ Right-click on your printer’s name and select ‘Printer Properties.’
Step 2) From there, click on the ‘Ports’ tab and then choose the printer’s IP address. Now select the option ‘Configure Port.’
Step 3) Check if there’s any tick next to the ‘SNMP Status Enable’ option. Click on it to uncheck the option and then choose ‘OK’ for saving the changes.
Method Nine – Use Printer Software
Many printer manufacturers own printer software to let your windows manage and troubleshoot the printer. You can go to the printer manufacturer’s website to install the software. Or, your printer manufacturer might have provided a CD containing the software.
To check whether the software is installed or not, go to settings and click on ‘Devices.’ Then select ‘Printers & Scanners’, choose your printer’s name, and then ‘Manage.’ If the software is installed, you’ll see the option ‘Open printer app.’
Click on it to open the software and look for troubleshooting options to bring the offline printer status back online.
Method Ten – Reinstall the Printer
If the printer offline message keeps appearing even after you have tried all our methods, you should try to remove the current printer and reinstall it or install a new printer. Here’s how you can remove and reinstall it –
Step 1) Open your computer’s settings and choose ‘Devices.’ From the menu bar, select ‘Printers & Scanners’ and then your printer’s name.
Step 2) Click on ‘Remove Device’ and select ‘Yes’ to remove the current printer.
Step 3) Now go for the option ‘Add printer or scanner.’ Follow the necessary steps to reinstall the printer.
Final Words
So, now you know how to get a printer online Windows 10. Before anything else, try our first three methods to solve the printer offline errors in your Windows 10 easily.
If none of our methods work for your computer, the problem might be hardware-related. In that case, you need to get your printers to a technician or change the printer drivers to solve the issues.
Matthew Burleigh has been writing tech tutorials since 2008. His writing has appeared on dozens of different websites and been read over 50 million times.
After receiving his Bachelor’s and Master’s degrees in Computer Science he spent several years working in IT management for small businesses. However, he now works full time writing content online and creating websites.
His main writing topics include iPhones, Microsoft Office, Google Apps, Android, and Photoshop, but he has also written about many other tech topics as well.
Read his full bio here.
Featured guides and deals
When smartphones first started to gain popularity, the prospect of printing something from them seemed like a pipe dream. Printers were already hard enough to deal with on a computer, and it seemed unlikely that it could work on a phone.
But the Google Docs app started adding new features like the ability to add small numbers in Google Docs , and it became apparent that the app was going to gain most of its desktop counterpart’s functionality.
Now we are also able to print from Google Docs on our iPhone or Android device, and it’s surprisingly accessible.
Most modern printers have some sort of network compatibility, meaning that devices on the same network as the printer can use that printer if they have that capability.
Mobile phones, but those that use the iOS and Android operating systems, are now able to print wirelessly to printers that support it. Plus, most of the apps that you would want to print from, such as creative apps and productivity apps, will usually support some type of printing functionality in addition to the other features they offer, like file sharing .
Our guide below will show you how to print through the Google Docs app on your iPhone or Android phone, plus we will address some of the common issues that might arise if you can’t make it work.
How to Print from the Google Docs Mobile App
- Open Docs.
- Choose a document.
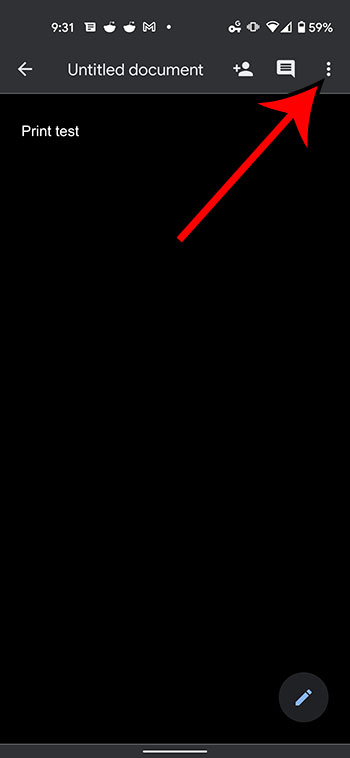
- Tap the three dots.
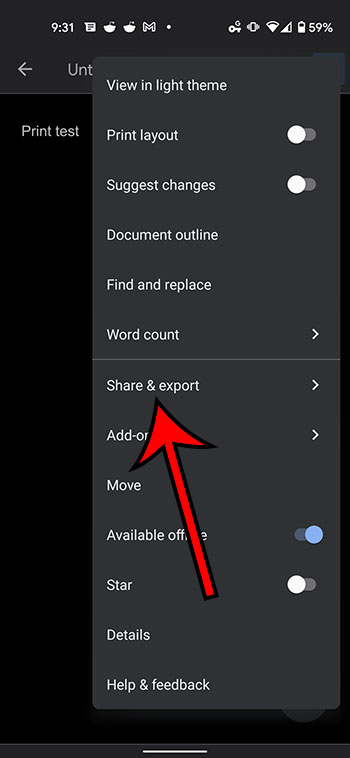
- Select Share & export .
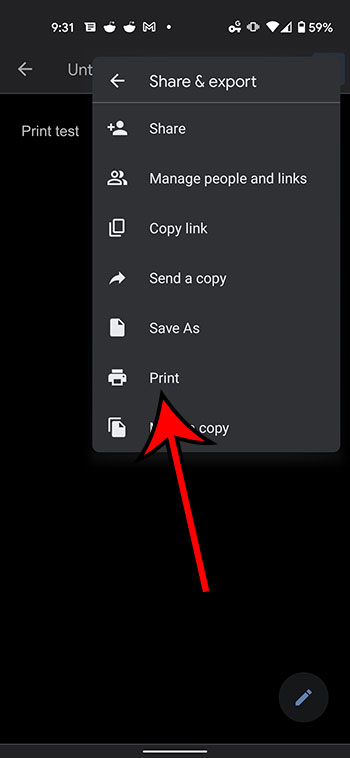
- Choose Print .
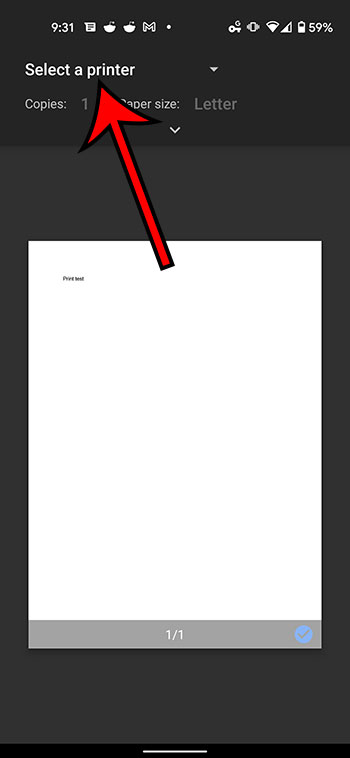
- Touch Select Printer .
- Chose a printer.
- Tap Print .
Our guide continues below with additional information on printing from the Google Docs app, including pictures of these steps.
How to Print from Google Docs on an iPhone (Guide with Pictures)
The steps in this section were performed on an iPhone 11 in iOS 14.6. These steps will also work on other iPhone models using this same version of iOS, as well as in most other versions of iOS. I am using the most current version of the Google Docs app that was available at the time this article was written.
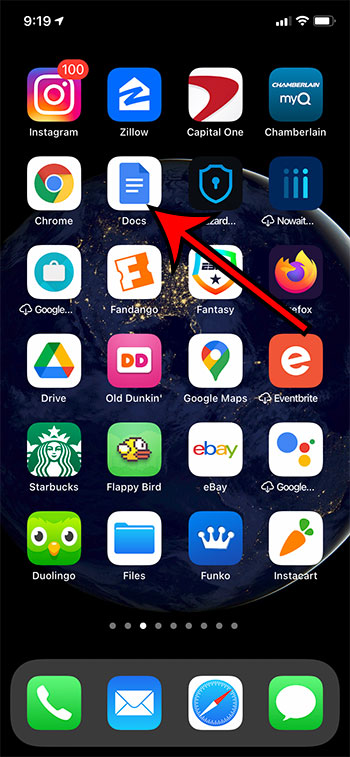
Step 1: Open theDocsapp on your iPhone.
Step 2: Select the document that you want to print.
Step 3: Touch the three dots at the top-right of the screen.
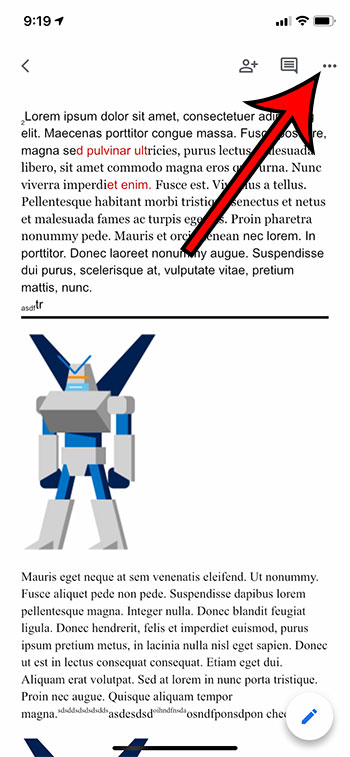
Step 4: Select theShare & exportoption.
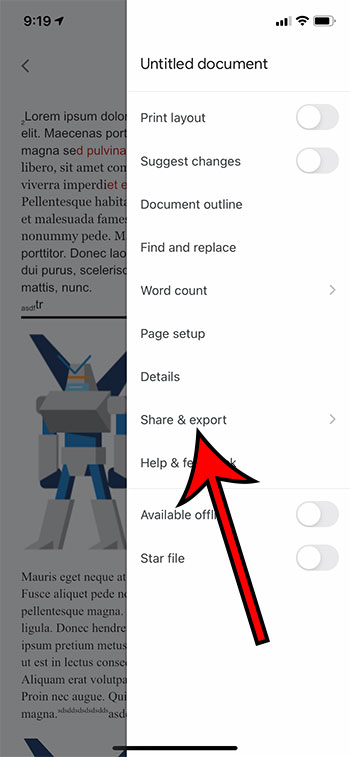
Step 5: ChoosePrint.
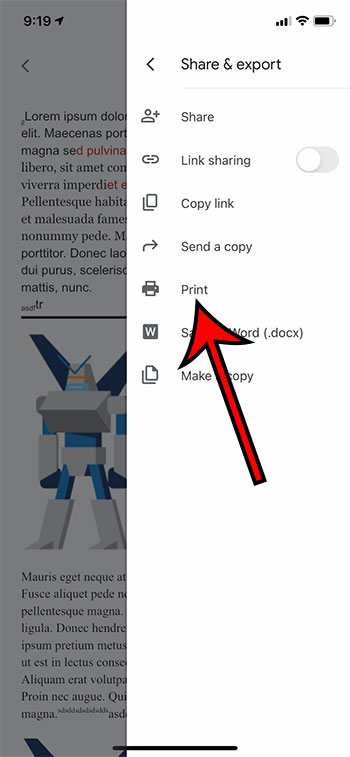
Step 6: Tap theSelect Printeroption.
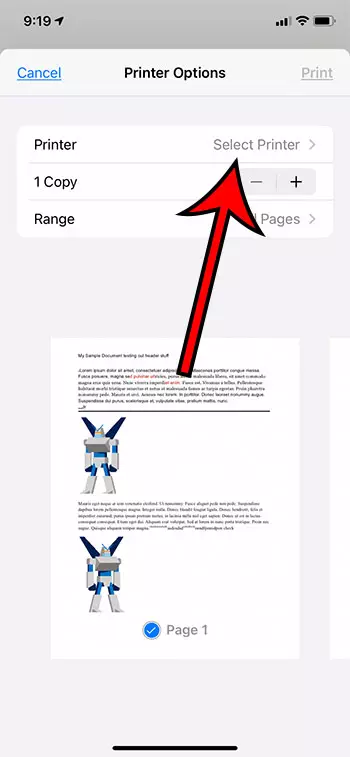
Step 7: Choose your printer.
Step 8: TapPrintat the top-right corner of the screen.
Our article continues below with information on how to print from your Android device.
How to Print from Google Docs on Android (Guide with Pictures)
The steps in this section were performed on a Google Pixel 4A, using Android 11. I am using the most current version of the Docs app that was available when I wrote this article.
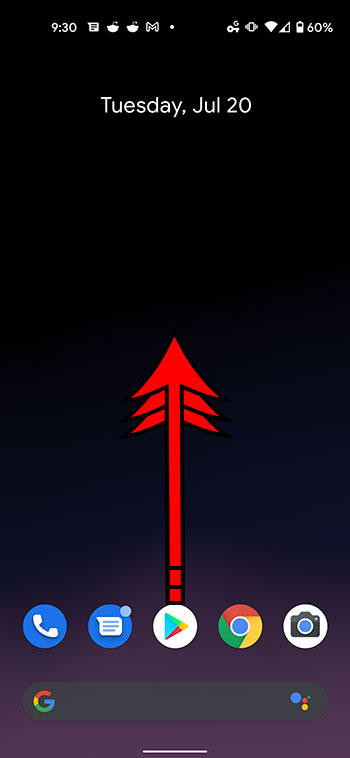
Step 1: Swipe up from the center of the screen.
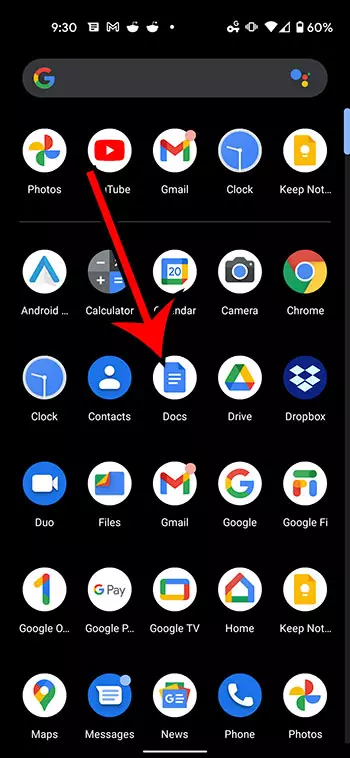
Step 2: Touch theDocsicon.
Step 3: Choose the document from your Google Drive that you want to print.
Step 4: Tap the three vertical dots at the top of the screen.
Step 5: Select theShare & exportoption from the menu on the right side of the screen.
Step 6: ChosePrintfrom the list of sharing options.
Step 7: Touch theSelect a printerdropdown at the top of the screen.
Step 8: Select the desired printer from the list of printing options.
Step 9: Tap thePrinticon.
Our article continues below with additional information on printing from Google Docs.
Why Isn’t My Printer Listed?
Trying to resolve printing issues can be a tricky prospect, as printers are notoriously difficult to work with. When you combine this with the fact that you are printing from a mobile device, then there is a strong possibility that something isn’t going to work properly.
The first thing to check when you are trying to print is that your mobile device is connected to the same wireless network as the printer. If your iPhone or Android device is not on Wi-Fi, then you probably won’t see your printer.
A second consideration is that the printer may not be turned on. Many modern printers will turn off if they haven’t been used in a while. If you don’t see the printer but know that it should be there, try power cycling the printer (turning it off and on again) then wait a few minutes to see if it shows up in your mobile device’s printer list.
One final option to check is whether or not the printer is AirPrint compatible. Since you aren’t able to install print drivers on your mobile device, your printer will use a feature called AirPrint so that it can communicate with your phone. However, not all printers have this feature. Additionally, not all printers are network compatible. If your printer isn’t connected to your local network, either wirelessly or via an ethernet cable, then you probably won’t be able to communicate with the printer through your smartphone.
What is Google Cloud Print
There is a feature that is available as part of your Google Account that is called Google Cloud Print. If you have installed the Chrome browser on your computer and have added it as a printer that is available through Cloud Print, then this gives you some additional printing options.
After you select the Print option from the Share & export menu, you will see Google Cloud Print option listed there as well. If you choose that option you can follow the instructions on screen to select a printer and send it there. This means that you can even print Google Docs files on a printer that is in a completely different location.
How to Print from Google Docs on a Laptop or Desktop Computer
Printing a Google Docs document from your computer via a Web browser is a similar process to printing other documents. I am going to perform the steps below using the Chrome browser, but you can also use another browser like Firefox, Edge, or Safari.
Step 1: Navigate to https://docs.google.com and open the Google Docs file that you would like to print.
Step 2: Select File at the top-left of the window.
Step 3: Choose the Print option at the bottom of the menu.
Step 4: Adjust the print settings as needed, then click the blue Print button.
More Information on How to Print from Google Docs on iPhone or Android
The number of options that you can adjust when printing from your iPhone or Android device is pretty large.
When you have the Printer options menu open on your iPhone you will be able to specify the number of copies that you want to print, as well as the range, whether or not to print double-sided, and whether you want to print in black and white or color. Other document settings can be changed through the Page setup menu that is accessible from the menu where you selected the Share & export option.
The number of printing options on Android is greater, although you might initially have trouble locating them. After you choose the Print option from the Share & export menu, then select your printer, there will be a small downward-facing arrow in the top section. If you tap that arrow you will have these options:
- Copies
- Paper size
- Color
- Orientation
- Two-sided
- Pages
- More options
If you choose more options then you will be given the option to install additional device services, or to manage existing services.
While this article is focused specifically on printing from mobile phones, the same steps will work to print documents on an iPhone or iPad, as the Docs app and the printing process is similar for both of those iOS devices.
Additional Sources
Matthew Burleigh has been writing tech tutorials since 2008. His writing has appeared on dozens of different websites and been read over 50 million times.
After receiving his Bachelor’s and Master’s degrees in Computer Science he spent several years working in IT management for small businesses. However, he now works full time writing content online and creating websites.
His main writing topics include iPhones, Microsoft Office, Google Apps, Android, and Photoshop, but he has also written about many other tech topics as well.
Read his full bio here.
