Saving a Google Doc as a PDF on your iPad is super easy and only takes a few steps. First, you need to open the Google Docs app and select the document you want to save. Then, use the “Share & export” option to choose “Send a copy.” Finally, select PDF as the format and share it to your desired location. That’s it!
How to Save a Google Doc as PDF on iPad
In this guide, we’ll walk you through each step to ensure you can easily save your Google Doc as a PDF right from your iPad.
Step 1: Open the Google Docs App
First, open the Google Docs app on your iPad.
Make sure you have the Google Docs app installed on your iPad. If not, download it from the App Store. Once you have it, tap on the app to open it.
Step 2: Select Your Document
Next, find and tap on the document you want to save as a PDF.
Make sure you select the correct document. If you have a lot of documents, you might need to scroll through your list or use the search bar at the top.
Step 3: Tap the Three Dots Menu
Tap on the three dots (also known as the More menu) in the top-right corner of your screen.
This menu gives you access to various options for your document. You’ll find options like “Share & export” and “Print” in this menu.
Step 4: Tap on “Share & Export”
From the menu, tap “Share & export.”
This will bring up more options related to sharing and exporting your document. It’s the gateway to saving your document in different formats.
Step 5: Select “Send a Copy”
Tap on “Send a copy” from the options that appear.
This step is crucial because it allows you to choose the format you want to save your document in. It’s like telling the app, “Hey, I want to make a copy of this, and I’m not picky about how.”
Step 6: Choose PDF Format
Select “PDF” from the list of file formats.
Choosing PDF ensures that your document maintains its formatting regardless of the device or software used to open it. It’s a universal format, which is super handy.
Step 7: Decide Where to Send the PDF
Choose where you want to send the PDF, such as an email, your iCloud Drive, or another app.
You can send your PDF via email, save it to your iCloud Drive, or share it through another app installed on your iPad. Just tap on your choice and follow the prompts.
After completing these steps, your Google Doc will be saved as a PDF and sent to your chosen location. This is super convenient for sharing documents without worrying about format issues.
Tips for How to Save a Google Doc as PDF on iPad
- Make sure your Google Docs app is updated to the latest version for a smoother experience.
- Adjust the document formatting before converting to PDF to ensure it looks exactly how you want.
- Use the search bar in Google Docs if you have trouble finding your document.
- Double-check your PDF by opening it after saving to ensure it converted correctly.
- If you’re sharing sensitive information, consider using a secure method like encrypted email.
Can I save a Google Doc as PDF without the Google Docs app?
No, you need the Google Docs app to convert the document to PDF on your iPad.
Does saving a Google Doc as a PDF affect the original document?
No, your original Google Doc remains unchanged after saving it as a PDF.
Can I edit the PDF after saving it?
You can’t edit a PDF directly in Google Docs, but you can use other apps like Adobe Acrobat to make changes.
Do I need an internet connection to save a Google Doc as PDF?
Yes, you need an internet connection to access your Google Docs and convert them to PDF.
Is there a limit to the number of Google Docs I can convert to PDF?
There is no limit as long as you have enough storage space on your iPad and in your Google Drive.
Summary
- Open the Google Docs app.
- Select your document.
- Tap the three dots menu.
- Tap “Share & export.”
- Select “Send a copy.”
- Choose PDF format.
- Decide where to send the PDF.
Conclusion
And there you have it! You now know how to save a Google Doc as a PDF on your iPad. This skill can be a real lifesaver when you need to share documents quickly and in a universally accepted format. PDFs ensure that your document’s formatting stays intact, no matter where it’s viewed.
For further reading, consider exploring how to edit PDFs on your iPad, which can add even more flexibility to your document management. Don’t forget to keep your Google Docs app updated to avoid any hiccups during the process.
So go ahead, give it a try, and make your document-sharing game as smooth as butter!

Matthew Burleigh has been writing tech tutorials since 2008. His writing has appeared on dozens of different websites and been read over 50 million times.
After receiving his Bachelor’s and Master’s degrees in Computer Science he spent several years working in IT management for small businesses. However, he now works full time writing content online and creating websites.
His main writing topics include iPhones, Microsoft Office, Google Apps, Android, and Photoshop, but he has also written about many other tech topics as well.
Read his full bio here.
Featured guides and deals
When smartphones first started to gain popularity, the prospect of printing something from them seemed like a pipe dream. Printers were already hard enough to deal with on a computer, and it seemed unlikely that it could work on a phone.
But the Google Docs app started adding new features like the ability to add small numbers in Google Docs , and it became apparent that the app was going to gain most of its desktop counterpart’s functionality.
Now we are also able to print from Google Docs on our iPhone or Android device, and it’s surprisingly accessible.
Most modern printers have some sort of network compatibility, meaning that devices on the same network as the printer can use that printer if they have that capability.
Mobile phones, but those that use the iOS and Android operating systems, are now able to print wirelessly to printers that support it. Plus, most of the apps that you would want to print from, such as creative apps and productivity apps, will usually support some type of printing functionality in addition to the other features they offer, like file sharing .
Our guide below will show you how to print through the Google Docs app on your iPhone or Android phone, plus we will address some of the common issues that might arise if you can’t make it work.
How to Print from the Google Docs Mobile App
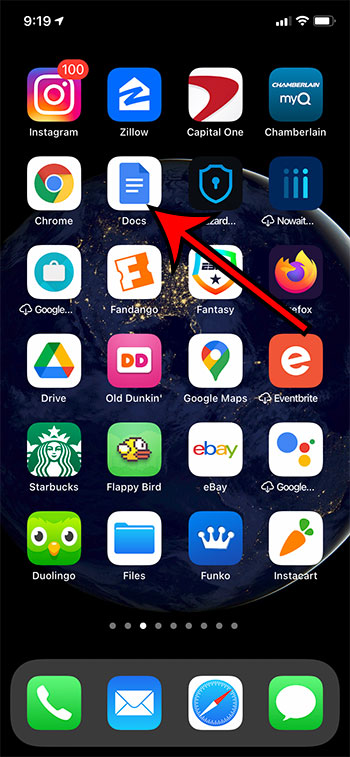
- Open Docs.
- Choose a document.
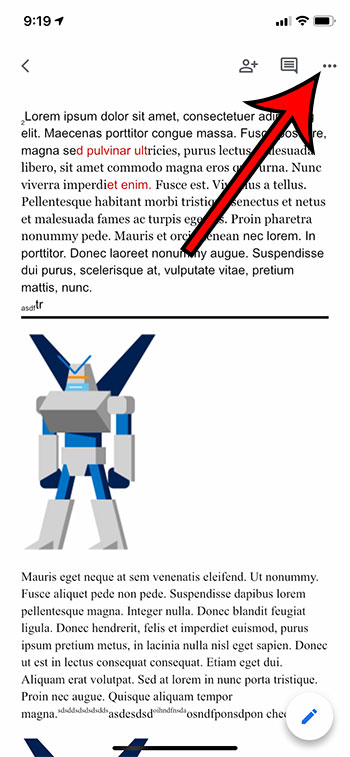
- Tap the three dots.
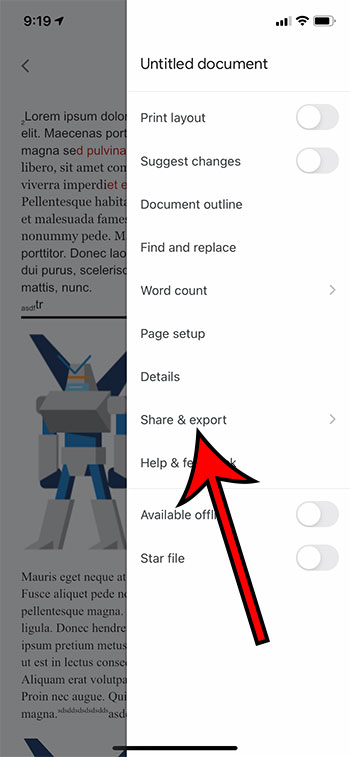
- Select Share & export .
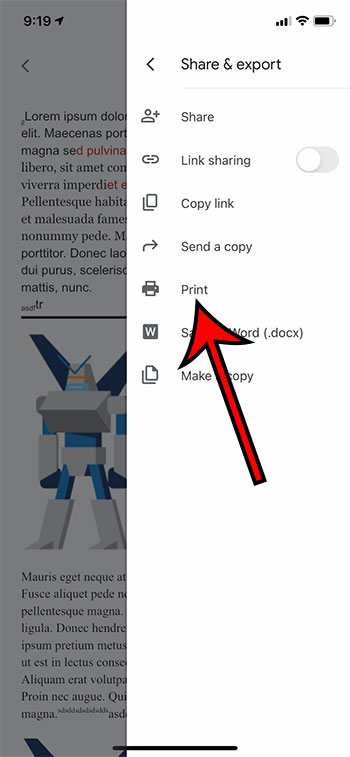
- Choose Print .
- Touch Select Printer .
- Chose a printer.
- Tap Print .
Our guide continues below with additional information on printing from the Google Docs app, including pictures of these steps.
How to Print from Google Docs on an iPhone (Guide with Pictures)
The steps in this section were performed on an iPhone 11 in iOS 14.6. These steps will also work on other iPhone models using this same version of iOS, as well as in most other versions of iOS. I am using the most current version of the Google Docs app that was available at the time this article was written.
Step 1: Open theDocsapp on your iPhone.
Step 2: Select the document that you want to print.
Step 3: Touch the three dots at the top-right of the screen.
Step 4: Select theShare & exportoption.
Step 5: ChoosePrint.
Step 6: Tap theSelect Printeroption.
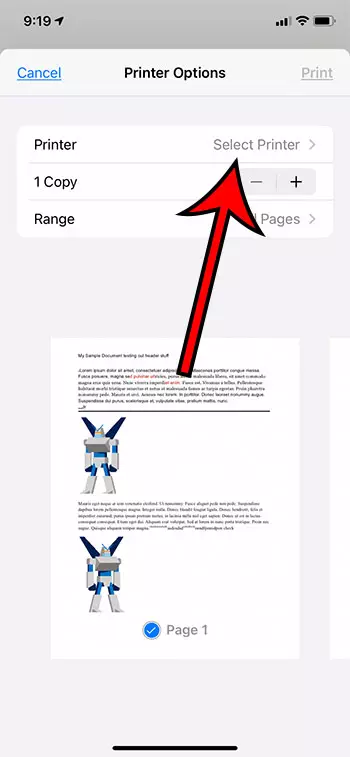
Step 7: Choose your printer.
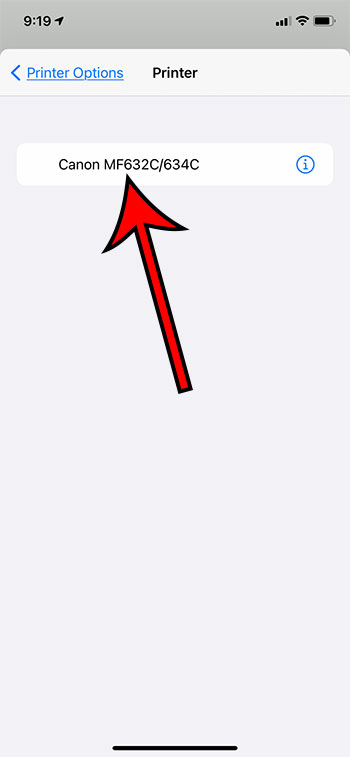
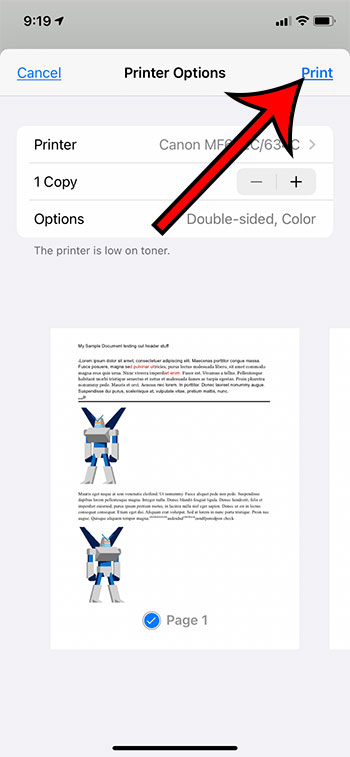
Step 8: TapPrintat the top-right corner of the screen.
Our article continues below with information on how to print from your Android device.
How to Print from Google Docs on Android (Guide with Pictures)
The steps in this section were performed on a Google Pixel 4A, using Android 11. I am using the most current version of the Docs app that was available when I wrote this article.
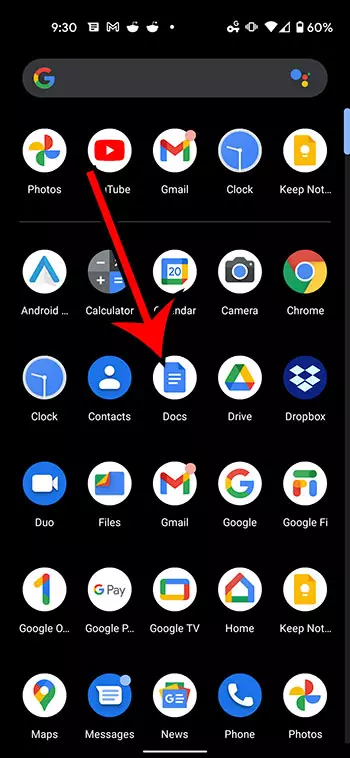
Step 1: Swipe up from the center of the screen.
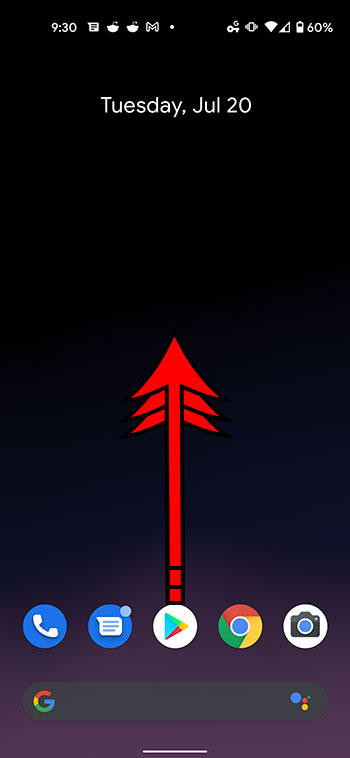
Step 2: Touch theDocsicon.
Step 3: Choose the document from your Google Drive that you want to print.
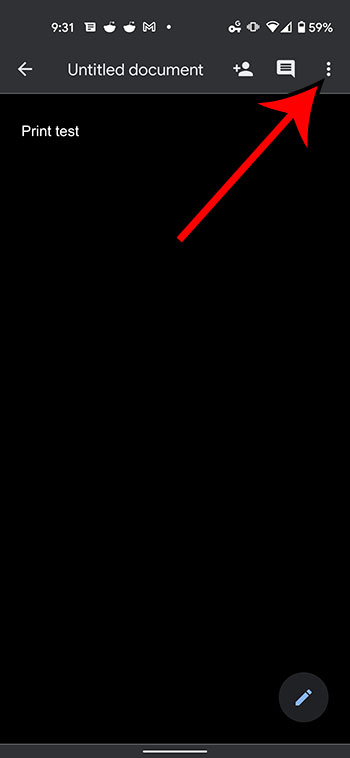
Step 4: Tap the three vertical dots at the top of the screen.
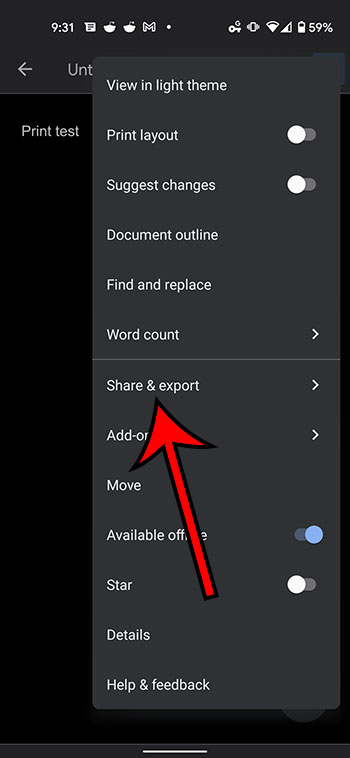
Step 5: Select theShare & exportoption from the menu on the right side of the screen.
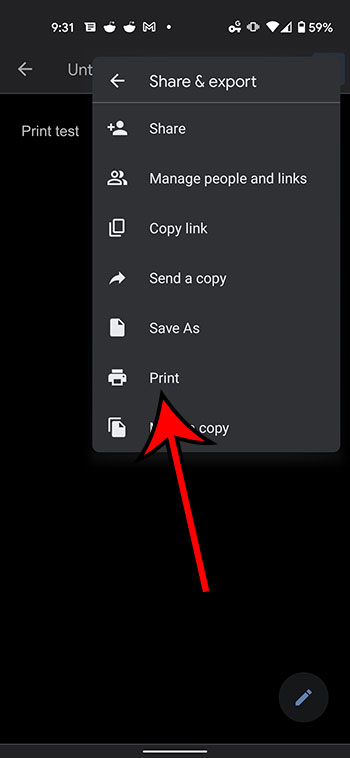
Step 6: ChosePrintfrom the list of sharing options.
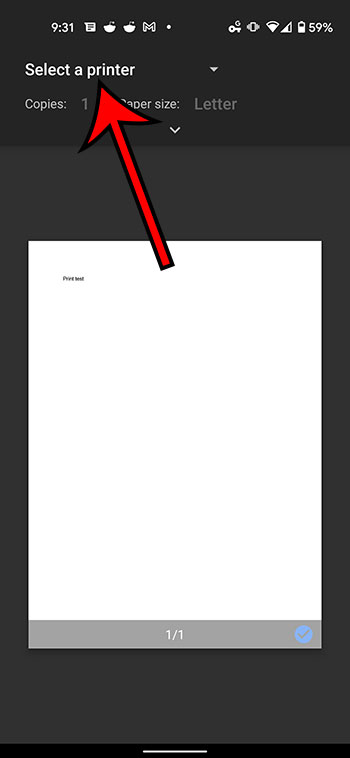
Step 7: Touch theSelect a printerdropdown at the top of the screen.
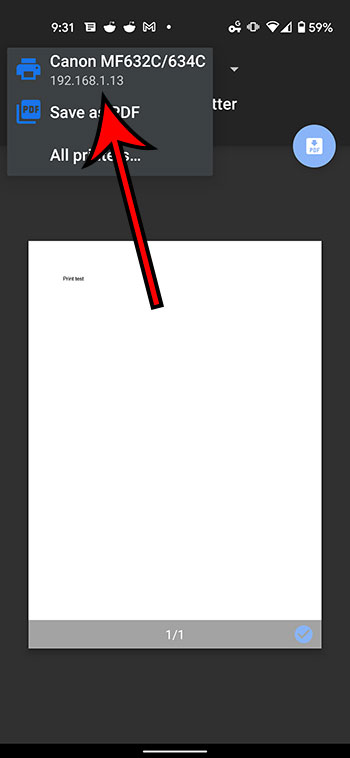
Step 8: Select the desired printer from the list of printing options.
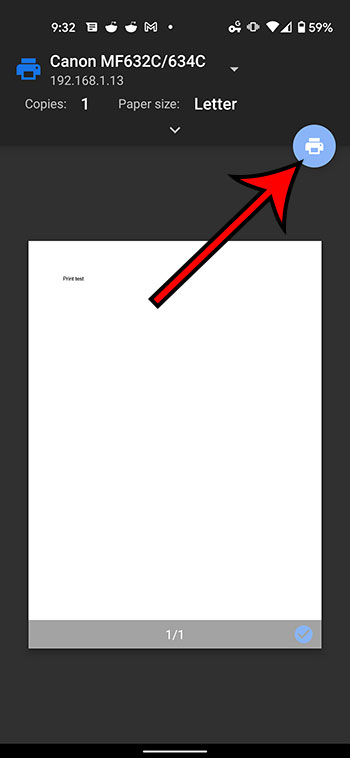
Step 9: Tap thePrinticon.
Our article continues below with additional information on printing from Google Docs.
Why Isn’t My Printer Listed?
Trying to resolve printing issues can be a tricky prospect, as printers are notoriously difficult to work with. When you combine this with the fact that you are printing from a mobile device, then there is a strong possibility that something isn’t going to work properly.
The first thing to check when you are trying to print is that your mobile device is connected to the same wireless network as the printer. If your iPhone or Android device is not on Wi-Fi, then you probably won’t see your printer.
A second consideration is that the printer may not be turned on. Many modern printers will turn off if they haven’t been used in a while. If you don’t see the printer but know that it should be there, try power cycling the printer (turning it off and on again) then wait a few minutes to see if it shows up in your mobile device’s printer list.
One final option to check is whether or not the printer is AirPrint compatible. Since you aren’t able to install print drivers on your mobile device, your printer will use a feature called AirPrint so that it can communicate with your phone. However, not all printers have this feature. Additionally, not all printers are network compatible. If your printer isn’t connected to your local network, either wirelessly or via an ethernet cable, then you probably won’t be able to communicate with the printer through your smartphone.
What is Google Cloud Print
There is a feature that is available as part of your Google Account that is called Google Cloud Print. If you have installed the Chrome browser on your computer and have added it as a printer that is available through Cloud Print, then this gives you some additional printing options.
After you select the Print option from the Share & export menu, you will see Google Cloud Print option listed there as well. If you choose that option you can follow the instructions on screen to select a printer and send it there. This means that you can even print Google Docs files on a printer that is in a completely different location.
How to Print from Google Docs on a Laptop or Desktop Computer
Printing a Google Docs document from your computer via a Web browser is a similar process to printing other documents. I am going to perform the steps below using the Chrome browser, but you can also use another browser like Firefox, Edge, or Safari.
Step 1: Navigate to https://docs.google.com and open the Google Docs file that you would like to print.
Step 2: Select File at the top-left of the window.
Step 3: Choose the Print option at the bottom of the menu.
Step 4: Adjust the print settings as needed, then click the blue Print button.
More Information on How to Print from Google Docs on iPhone or Android
The number of options that you can adjust when printing from your iPhone or Android device is pretty large.
When you have the Printer options menu open on your iPhone you will be able to specify the number of copies that you want to print, as well as the range, whether or not to print double-sided, and whether you want to print in black and white or color. Other document settings can be changed through the Page setup menu that is accessible from the menu where you selected the Share & export option.
The number of printing options on Android is greater, although you might initially have trouble locating them. After you choose the Print option from the Share & export menu, then select your printer, there will be a small downward-facing arrow in the top section. If you tap that arrow you will have these options:
- Copies
- Paper size
- Color
- Orientation
- Two-sided
- Pages
- More options
If you choose more options then you will be given the option to install additional device services, or to manage existing services.
While this article is focused specifically on printing from mobile phones, the same steps will work to print documents on an iPhone or iPad, as the Docs app and the printing process is similar for both of those iOS devices.
Additional Sources
Matthew Burleigh has been writing tech tutorials since 2008. His writing has appeared on dozens of different websites and been read over 50 million times.
After receiving his Bachelor’s and Master’s degrees in Computer Science he spent several years working in IT management for small businesses. However, he now works full time writing content online and creating websites.
His main writing topics include iPhones, Microsoft Office, Google Apps, Android, and Photoshop, but he has also written about many other tech topics as well.
Read his full bio here.
Featured guides and deals
