Transferring music from your computer to your iPad is a straightforward process. You can do this by using iTunes or Finder on your computer, connecting your iPad, and simply copying over the music files. This process will allow you to enjoy your favorite tracks on the go.
How to Transfer Music from Computer to iPad
In this step-by-step guide, we will walk you through the process of moving music files from your computer to your iPad. By the end of this tutorial, you’ll be able to listen to your favorite songs wherever you go.
Step 1: Connect Your iPad to Your Computer
Plug your iPad into your computer using a USB cable.
Make sure your iPad is recognized by your computer. If this is the first time you’re connecting the two devices, you might be prompted to trust the computer on your iPad. Simply follow the on-screen instructions to establish the connection.
Step 2: Open iTunes or Finder
Launch iTunes (on Windows or macOS Mojave and earlier) or Finder (on macOS Catalina and later).
This is where you’ll manage the content on your iPad. Both tools offer a simple interface for transferring files. If you don’t have iTunes installed, you can download it from Apple’s website.
Step 3: Select Your iPad
In iTunes or Finder, click on your iPad’s icon.
This will open up a menu where you can see various types of content that can be synced to your iPad, including music, movies, and more.
Step 4: Go to the Music Section
Click on the “Music” section in the sidebar.
Here, you’ll be able to manage which music files are synced to your iPad. You can choose to sync your entire music library or specific playlists, artists, albums, or genres.
Step 5: Choose the Music to Transfer
Select the music files you want to transfer.
Make sure to check the box next to “Sync Music” and then select the specific songs or playlists you want to transfer. You can also drag and drop files directly from your computer to your iPad’s music library in Finder.
Step 6: Start the Sync Process
Click on the “Apply” or “Sync” button to start transferring your music.
This will begin the process of copying the selected music files from your computer to your iPad. Depending on the size of your music library, this may take a few minutes.
Once the syncing is completed, your music will be available on your iPad. You can open the Music app to find your newly transferred songs and playlists.
Tips for How to Transfer Music from Computer to iPad
- Make sure both your iPad and computer are running the latest software updates to avoid compatibility issues.
- Use a high-quality USB cable to ensure a stable connection between your devices.
- If you encounter any issues, try restarting both your computer and iPad.
- Consider organizing your music files into playlists for easier management.
- Keep your music library backed up on an external drive to prevent data loss.
Why isn’t my iPad showing up in iTunes or Finder?
Ensure your USB cable is working properly and that you’ve trusted the computer on your iPad. Restart both devices if needed.
Can I transfer music without using iTunes or Finder?
Yes, you can use third-party software like iMazing or cloud services like Dropbox to transfer music.
Is it possible to transfer music wirelessly?
Yes, you can use services like Apple Music, iCloud Music Library, or AirDrop for wireless transfer.
What file formats are supported?
The iPad supports various formats including MP3, AAC, WAV, and AIFF. Make sure your files are in a compatible format.
Can I transfer music from multiple computers?
Yes, but be aware that syncing with a new computer may erase the existing music on your iPad.
Summary
- Connect Your iPad to Your Computer.
- Open iTunes or Finder.
- Select Your iPad.
- Go to the Music Section.
- Choose the Music to Transfer.
- Start the Sync Process.
Conclusion
Transferring music from computer to iPad is a simple task once you get the hang of it. By following these steps, you can easily move your favorite songs and enjoy them on your iPad. Make sure to keep your devices updated and use reliable USB cables for a hassle-free experience. Whether you’re using iTunes or Finder, this guide has you covered. If you’re looking for more ways to manage your music, consider exploring Apple’s cloud services or third-party apps. Start transferring your music today and enjoy a world of tunes at your fingertips!

Matthew Burleigh has been writing tech tutorials since 2008. His writing has appeared on dozens of different websites and been read over 50 million times.
After receiving his Bachelor’s and Master’s degrees in Computer Science he spent several years working in IT management for small businesses. However, he now works full time writing content online and creating websites.
His main writing topics include iPhones, Microsoft Office, Google Apps, Android, and Photoshop, but he has also written about many other tech topics as well.
Read his full bio here.
Do you have a long list of songs in your iTunes library, and want to view them when you are not near your computer? This can be helpful if you want to create a playlist while you are traveling, or if you want to see if there are songs that you do not own and want to purchase. One simple way to do this is to print out a list of all of the songs that you have in iTunes.
You might have previously done this in an earlier version of iTunes, but are having trouble doing so in iTunes 11. Fortunately it is still possible, and you can follow the few short steps in our tutorial below and print a document with a list of songs.
How to Print a List of Your iTunes Library in iTunes 11 in Windows
- Open iTunes .
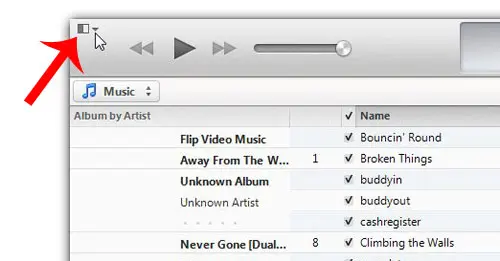
- Click the menu icon.
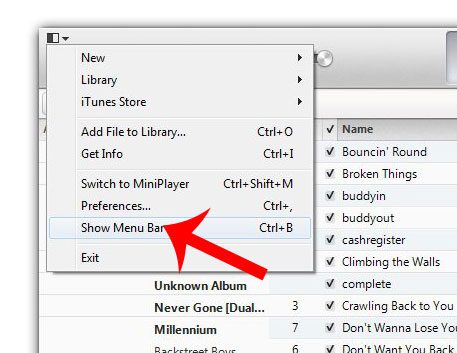
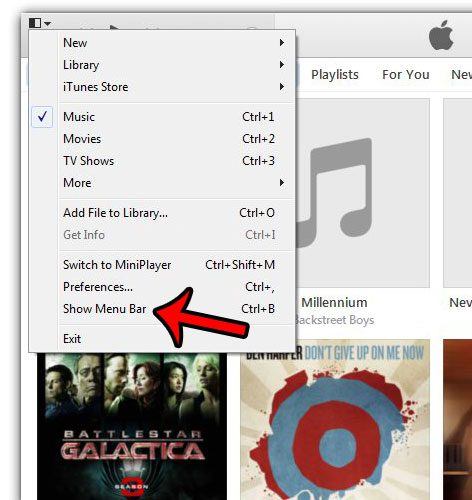
- Choose Show Menu Bar .
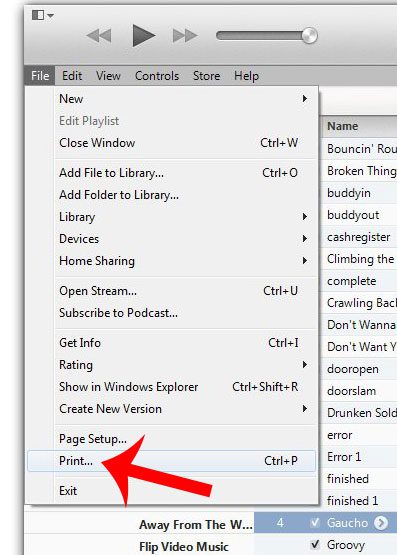
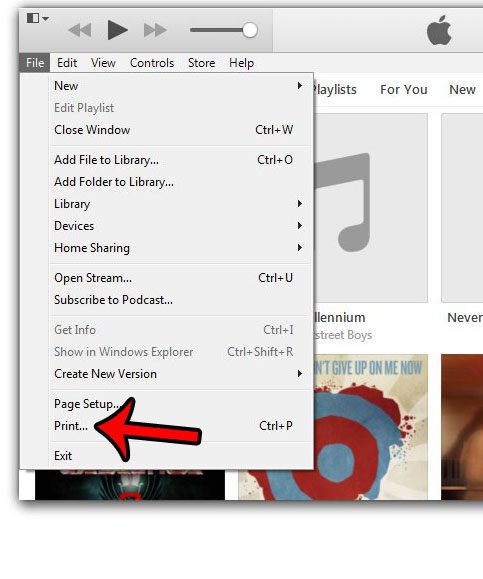
- Select File , then Print .
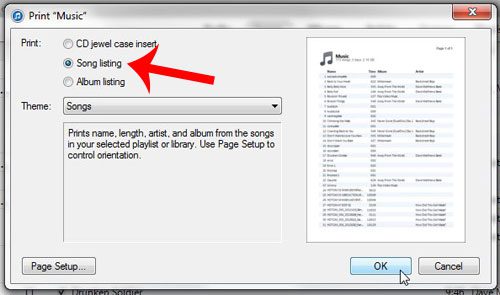
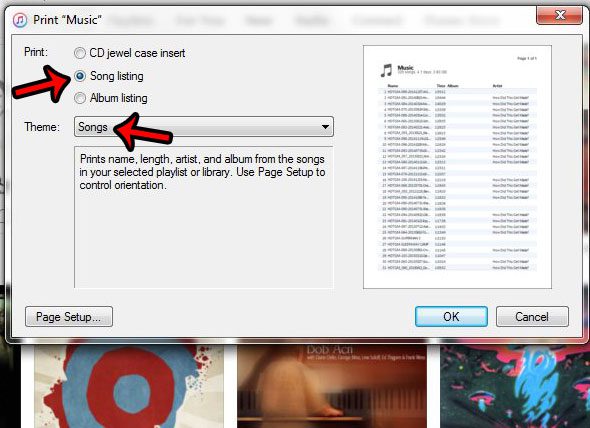
- Choose Song Listing , then OK .
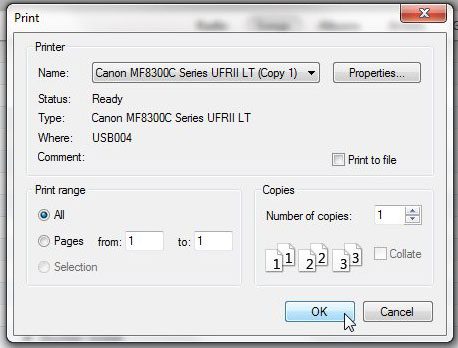
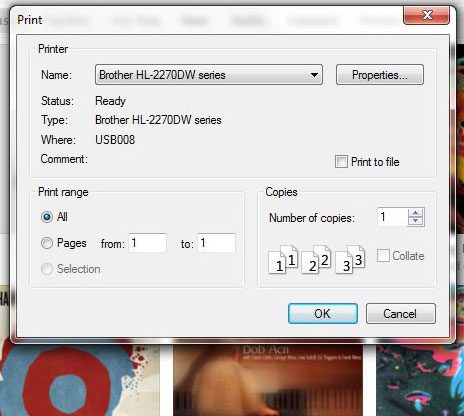
- Click Print .
Our guide continues below with additional information on working with song and file lists in iTunes, including pictures of these steps.
Printing Your iTunes Library in Windows
The steps in this tutorial were written using iTunes 11 on a Windows computer . We will be printing a list of the songs in your library in the steps below. The steps may be slightly different if you are using a different version of iTunes, or if you are on a Mac.
Step 1: Launch iTunes, then navigate to the library or playlist that you want to print.
Step 2: Click the iTunes menu icon at the top-left corner of the window.
Step 3: Click the Show Menu Bar option.
Step 4: Click the File tab at the top of the window, then click the Print option.
Step 5: Click the Song Listing option, then click the OK button.
Step 6: Click the Print button to print the list.
Do you want to download purchased songs in iTunes, but you are not able to? You might need to authorize your computer with your Apple ID to enable the ability to download songs through the program.
How to Create a List of Your iTunes Music Library
If you have ever needed to share a list of the songs in your iTunes library, whether you were planning an event, or were making a playlist of CD for someone, then you may have been looking for a simple way to generate that list. You can accomplish this goal by printing your library as a document, which can save you the hassle of a series of screenshots, or manually writing or typing a list.
But the option for printing a list of your iTunes library is not immediately obvious, so you can follow our guide below to see how to use the built-in printing functionality of iTunes on your Windows computer.
Print Your iTunes Library as a List in Windows 7
The steps in this article were performed using iTunes version 12.3.1.23, on a computer running Windows 7. However, this process is similar for many other iTunes versions in Windows.
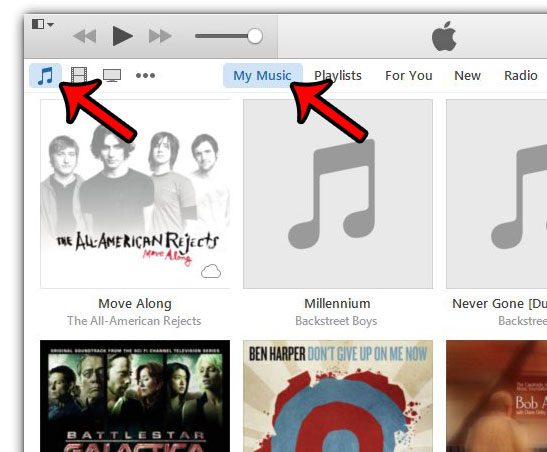
Step 1: Launch iTunes, then click the Music button, and select the My Music option to display your iTunes library. If you would prefer instead to create a list of movies or TV shows, then select that option instead.
Step 2: Click the iTunes Menu button at the top-left corner of the window, then click the Show Menu Bar option. You can also display the Menu Bar by pressing Ctrl + B on your keyboard.
Step 3: Click File , then click Print . Note that you can shortcut to the Print menu by pressing Ctrl + P on your keyboard instead.
Step 4: Select either the CD jewel case insert , Songs , or Albums option in the top-section, then click the Theme drop-down menu to specify how you want your selection to be listed. You can click the OK button at the bottom of the window when you have finished.
Step 5: Change any of the options that you wish to adjust on this window, then click the OK button to print the list of songs.
Did you add a gift card to your iTunes account, and you want to see how much is left on it? Learn how to check your Apple gift card balance from an iPhone.
Matthew Burleigh has been writing tech tutorials since 2008. His writing has appeared on dozens of different websites and been read over 50 million times.
After receiving his Bachelor’s and Master’s degrees in Computer Science he spent several years working in IT management for small businesses. However, he now works full time writing content online and creating websites.
His main writing topics include iPhones, Microsoft Office, Google Apps, Android, and Photoshop, but he has also written about many other tech topics as well.
Read his full bio here.
