Updating iTunes on Windows 11 is a straightforward process that ensures you have the latest features and security updates. By opening iTunes, navigating to the Help menu, and selecting “Check for Updates,” you’ll be guided through the update process. This quick action keeps your software running smoothly and securely.
How to Update iTunes on Windows 11
Updating iTunes ensures that you have access to the latest features, enhancements, and security fixes. Here’s how you can keep your iTunes up to date on a Windows 11 machine.
Step 1: Open iTunes
To begin, locate the iTunes application on your Windows 11 PC and open it.
Once you have iTunes open, you can access its main menu. This is where you’ll find the options you need to check for updates. It’s important to open the app correctly to ensure a seamless update process.
Step 2: Navigate to the Help Menu
In the iTunes menu bar, click on the “Help” option located at the top of the window.
This menu includes various support and troubleshooting options. Selecting “Help” is the first step in finding the update feature for iTunes. It’s a common place to look for assistance and updates in many applications.
Step 3: Click “Check for Updates”
From the Help menu, select “Check for Updates” to initiate the update process.
By choosing this option, iTunes will automatically search for the latest available updates. If an update is available, you’ll be prompted to download and install it. This ensures you have the latest version with all the necessary improvements.
Step 4: Follow the Instructions
If an update is found, follow the on-screen instructions to download and install it.
The prompts will guide you through the installation process. It may involve accepting terms and conditions and waiting for the download to complete. Make sure you have a stable internet connection for the best experience.
Step 5: Restart iTunes
Once the update is complete, restart iTunes to apply the changes.
Restarting ensures that all new features and fixes are correctly implemented. It’s a simple step, but crucial for finalizing the update process. Your iTunes should now be up to date and running optimally.
After completing these steps, your iTunes will be updated to the latest version. You’ll have access to new features, improved performance, and enhanced security.
Tips for Updating iTunes on Windows 11
- Regularly check for updates to ensure your software is current.
- Ensure a stable internet connection during the update to avoid interruptions.
- Consider backing up your iTunes library before updating to prevent data loss.
- Restart your computer if you experience any issues after the update.
- Keep your Windows 11 system updated for the best compatibility with iTunes.
Why should I update iTunes?
Updating iTunes ensures you have the latest features, performance improvements, and security patches, which helps protect your data and enhance your user experience.
What if I can’t find the “Check for Updates” option?
Ensure you’re in the Help menu within iTunes. If it’s still not visible, you might be running the Microsoft Store version, which updates through the store automatically.
Can I update iTunes without opening the application?
For the desktop version, you need to open iTunes to check for updates. However, if you have the Microsoft Store version, it updates automatically in the background.
What should I do if the update fails?
First, check your internet connection. If it’s stable, try restarting your computer and then attempt the update again. If issues persist, reinstalling iTunes might be necessary.
Is it safe to update iTunes?
Yes, it’s safe to update iTunes. Updates provide new features and fix security vulnerabilities, making it safer than running an outdated version.
Summary
- Open iTunes.
- Navigate to the Help Menu.
- Click “Check for Updates.”
- Follow the Instructions.
- Restart iTunes.
Conclusion
Keeping your iTunes updated on Windows 11 is essential to enjoy the latest features and improvements. By following the simple steps outlined in this guide, you’ll ensure your software is always running at its best. Regular updates not only bring new features but also patch security vulnerabilities, making your system more secure. It’s like giving your car a regular tune-up; it keeps everything running smoothly and efficiently.
For more helpful guides on managing your digital life, consider exploring additional resources or subscribing to tech blogs. Staying informed will help you make the most of your devices. So, don’t wait until your iTunes starts showing issues; take a proactive approach to keeping your software updated. Remember, a little effort today can save you from potential headaches tomorrow.

Matthew Burleigh has been writing tech tutorials since 2008. His writing has appeared on dozens of different websites and been read over 50 million times.
After receiving his Bachelor’s and Master’s degrees in Computer Science he spent several years working in IT management for small businesses. However, he now works full time writing content online and creating websites.
His main writing topics include iPhones, Microsoft Office, Google Apps, Android, and Photoshop, but he has also written about many other tech topics as well.
Read his full bio here.
Featured guides and deals
Do you have a long list of songs in your iTunes library, and want to view them when you are not near your computer? This can be helpful if you want to create a playlist while you are traveling, or if you want to see if there are songs that you do not own and want to purchase. One simple way to do this is to print out a list of all of the songs that you have in iTunes.
You might have previously done this in an earlier version of iTunes, but are having trouble doing so in iTunes 11. Fortunately it is still possible, and you can follow the few short steps in our tutorial below and print a document with a list of songs.
How to Print a List of Your iTunes Library in iTunes 11 in Windows
- Open iTunes .
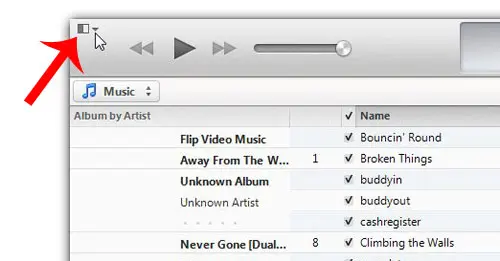
- Click the menu icon.
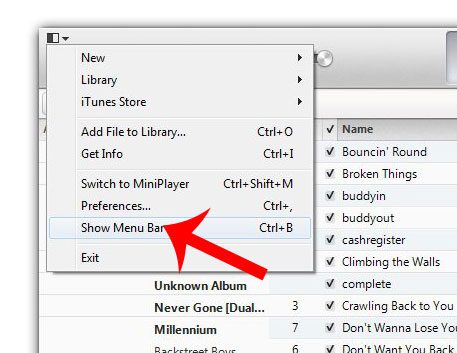
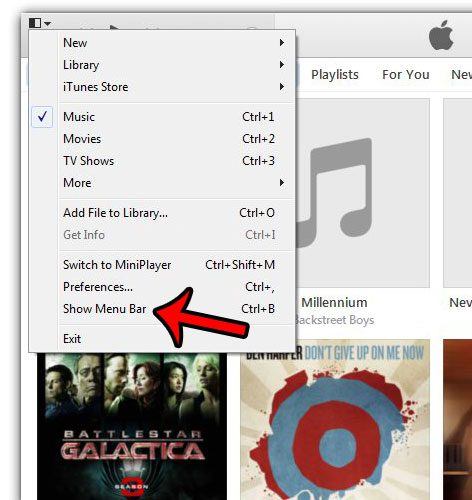
- Choose Show Menu Bar .
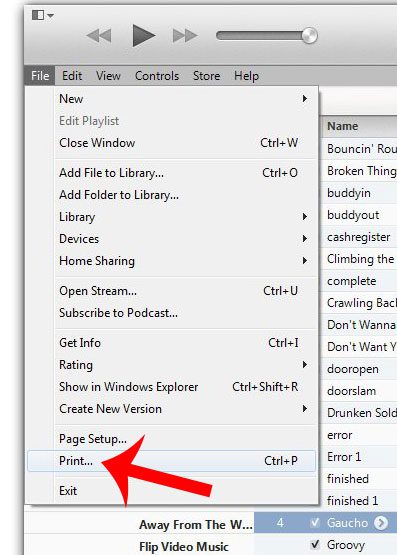
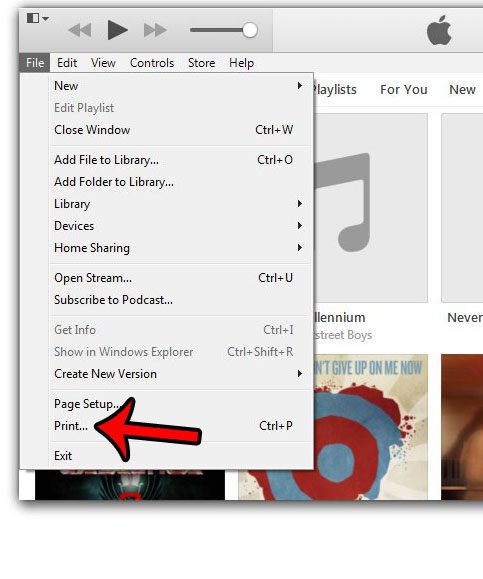
- Select File , then Print .
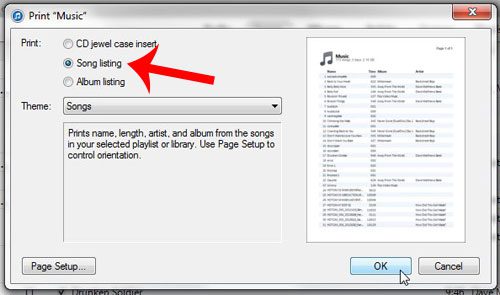
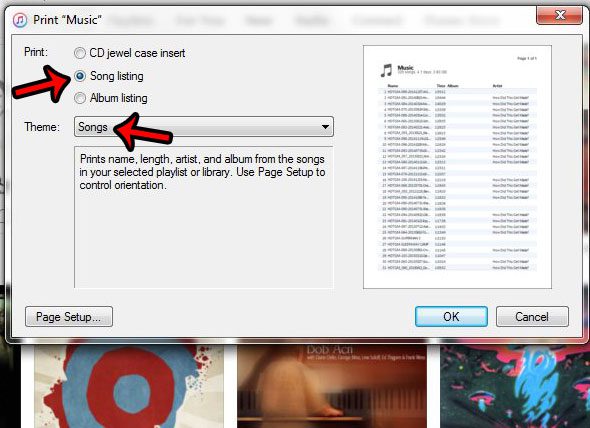
- Choose Song Listing , then OK .
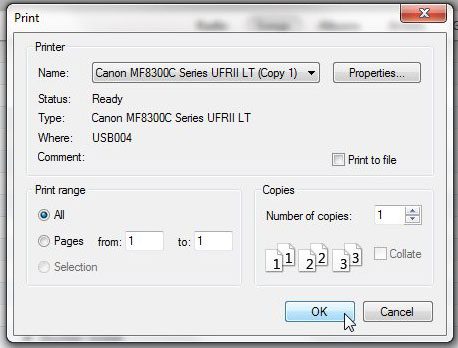
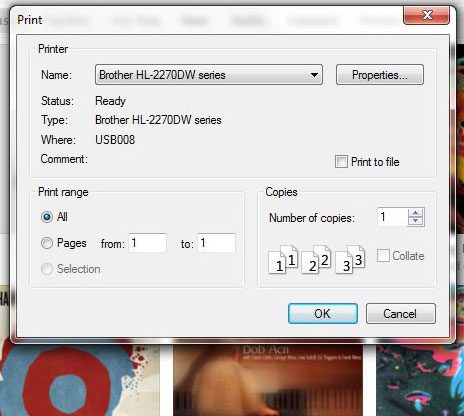
- Click Print .
Our guide continues below with additional information on working with song and file lists in iTunes, including pictures of these steps.
Printing Your iTunes Library in Windows
The steps in this tutorial were written using iTunes 11 on a Windows computer . We will be printing a list of the songs in your library in the steps below. The steps may be slightly different if you are using a different version of iTunes, or if you are on a Mac.
Step 1: Launch iTunes, then navigate to the library or playlist that you want to print.
Step 2: Click the iTunes menu icon at the top-left corner of the window.
Step 3: Click the Show Menu Bar option.
Step 4: Click the File tab at the top of the window, then click the Print option.
Step 5: Click the Song Listing option, then click the OK button.
Step 6: Click the Print button to print the list.
Do you want to download purchased songs in iTunes, but you are not able to? You might need to authorize your computer with your Apple ID to enable the ability to download songs through the program.
How to Create a List of Your iTunes Music Library
If you have ever needed to share a list of the songs in your iTunes library, whether you were planning an event, or were making a playlist of CD for someone, then you may have been looking for a simple way to generate that list. You can accomplish this goal by printing your library as a document, which can save you the hassle of a series of screenshots, or manually writing or typing a list.
But the option for printing a list of your iTunes library is not immediately obvious, so you can follow our guide below to see how to use the built-in printing functionality of iTunes on your Windows computer.
Print Your iTunes Library as a List in Windows 7
The steps in this article were performed using iTunes version 12.3.1.23, on a computer running Windows 7. However, this process is similar for many other iTunes versions in Windows.
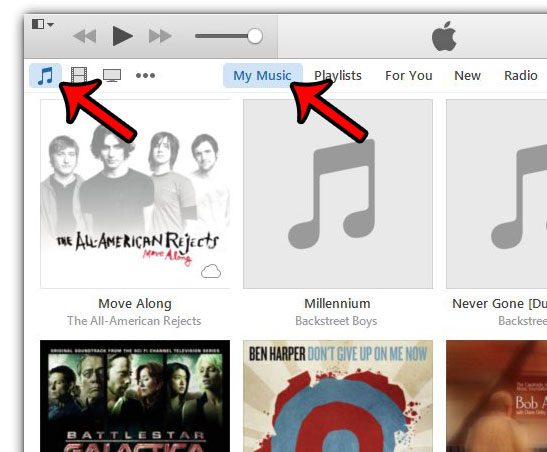
Step 1: Launch iTunes, then click the Music button, and select the My Music option to display your iTunes library. If you would prefer instead to create a list of movies or TV shows, then select that option instead.
Step 2: Click the iTunes Menu button at the top-left corner of the window, then click the Show Menu Bar option. You can also display the Menu Bar by pressing Ctrl + B on your keyboard.
Step 3: Click File , then click Print . Note that you can shortcut to the Print menu by pressing Ctrl + P on your keyboard instead.
Step 4: Select either the CD jewel case insert , Songs , or Albums option in the top-section, then click the Theme drop-down menu to specify how you want your selection to be listed. You can click the OK button at the bottom of the window when you have finished.
Step 5: Change any of the options that you wish to adjust on this window, then click the OK button to print the list of songs.
Did you add a gift card to your iTunes account, and you want to see how much is left on it? Learn how to check your Apple gift card balance from an iPhone.
Matthew Burleigh has been writing tech tutorials since 2008. His writing has appeared on dozens of different websites and been read over 50 million times.
After receiving his Bachelor’s and Master’s degrees in Computer Science he spent several years working in IT management for small businesses. However, he now works full time writing content online and creating websites.
His main writing topics include iPhones, Microsoft Office, Google Apps, Android, and Photoshop, but he has also written about many other tech topics as well.
Read his full bio here.
